Monthly Archives: March 2026

How to Choose the Right Outdoor Hut for Your Garden Space

Outdoor Hut Guide

Choosing the right outdoor hut comes down to the size of your space, your climate, and how you actually plan to use it. A lot of Aussie homeowners jump straight into browsing styles online before they’ve even measured their garden, which is a big mistake.

Your backyard is beyond just a leftover space behind the house. It’s an outdoor area with real potential, which is why the hut you pick should work with it.

So in this guide, you’ll find everything from sizing and materials to installation tips and a handy shed comparison. By the end, you’ll know exactly what suits your property.

Read on and let’s find the right fit.

Outdoor Hut Guide: What Your Garden Space Actually Needs

Outdoor Hut Guide: What Your Garden Space Actually Needs

The right hut design starts with understanding your garden, instead of just browsing styles online. Your outdoor area, the way sunlight hits it, and the space you actually have are the factors that determine what will work in your garden.

However, two things tend to trip people up early in the planning process. So, always start your planning with these:

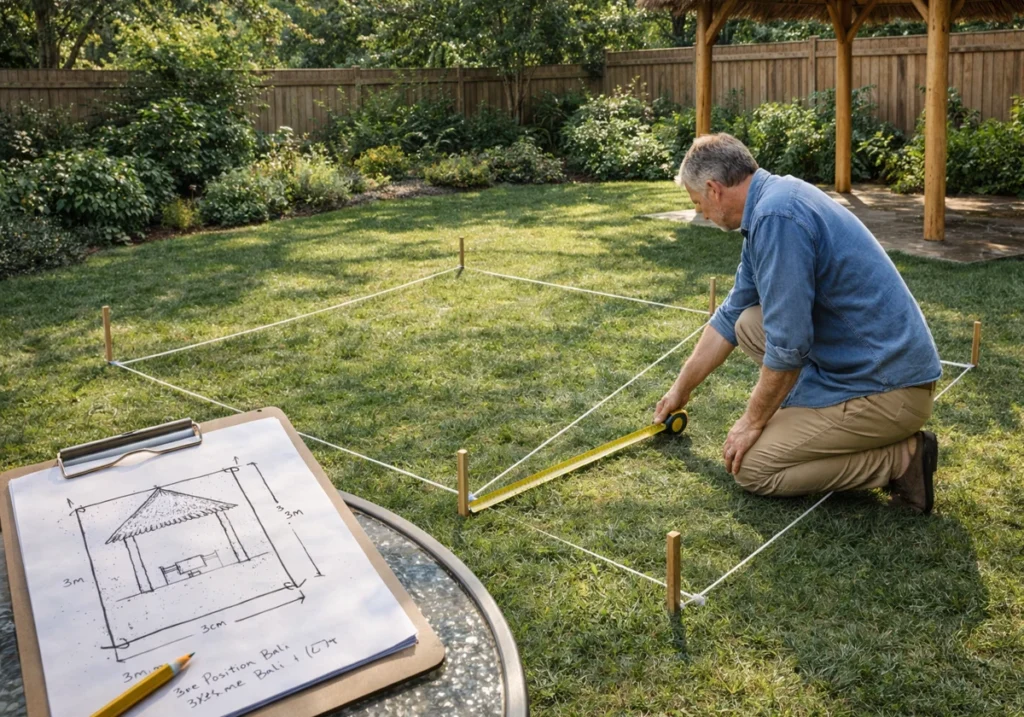
Size and Layout: Matching the Hut to Your Yard

Drawing from our experience, smaller yards suit compact Bali huts with a 3×3 m or 4×4 m footprint. This leaves enough room to move around comfortably without the hut swallowing up your whole garden.

The roof pitch, post height, and natural light all count here (trust us, we learned the hard way). Sometimes, even a low ceiling clearance can make even a well-built hut feel closed in, so factor that in before you build.

A good rule of thumb is to sketch your space out on paper first, including flooring options and where you want doors to face. Because an awkward location can make the whole setup feel cramped, and that’s a headache worth avoiding before installation day.

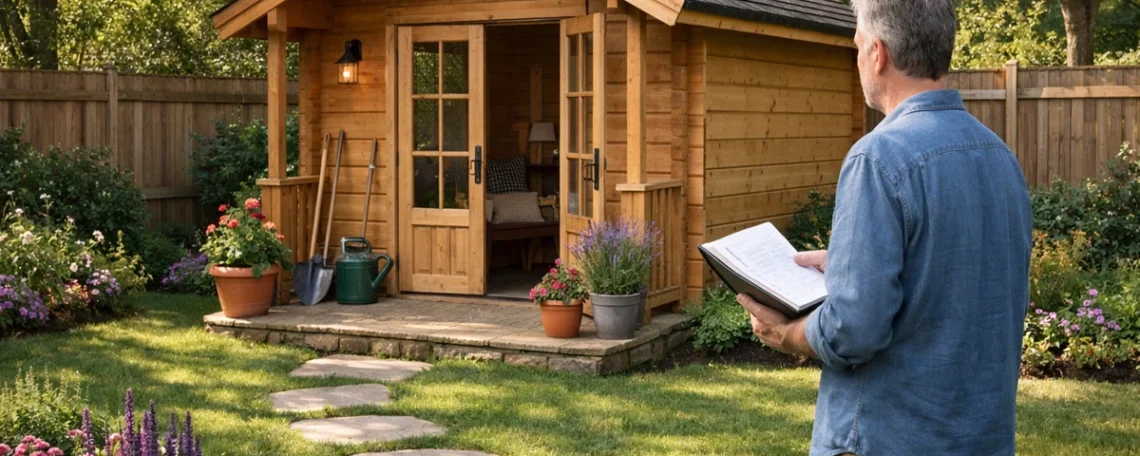
Outdoor Sheds vs. Bali Huts: Picking the Right Fit

Frankly, this is where the majority of the buyers get confused.

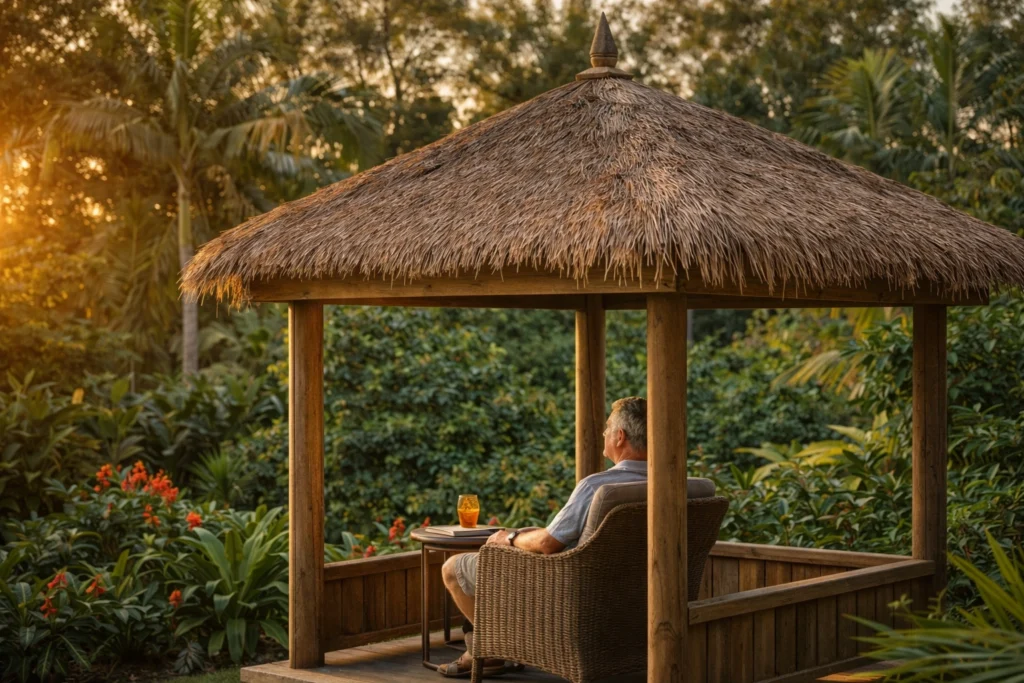
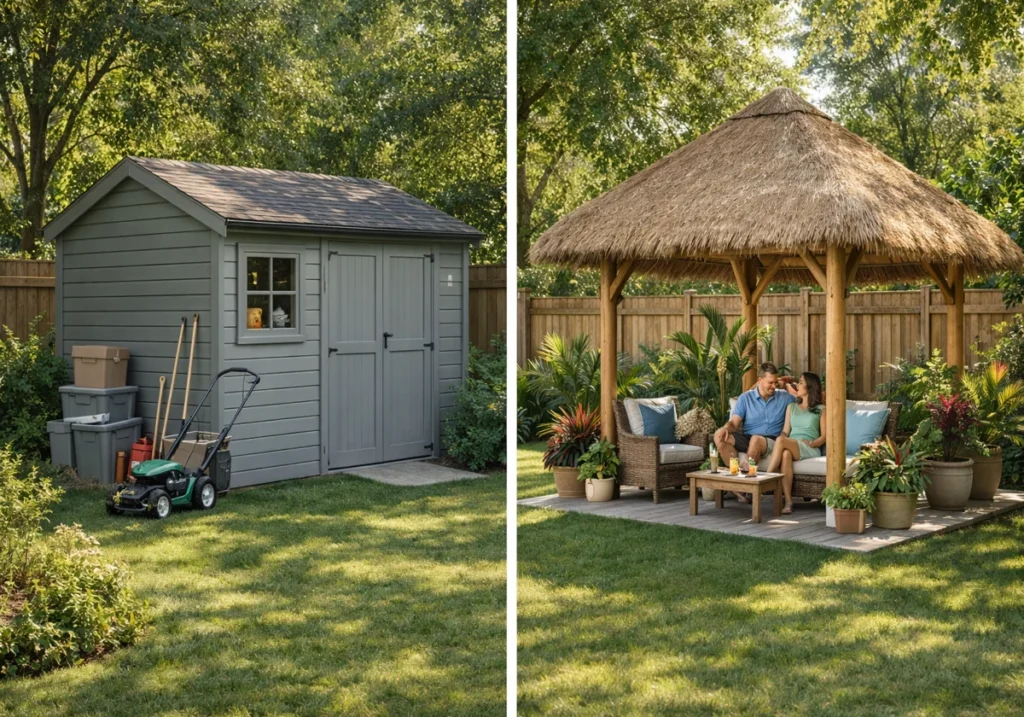
Outdoor sheds are fully enclosed structures built for storage andextra storage space, while Bali huts are open-air shade structures designed for living andentertaining. Although garages and garden sheds serve a purpose here, they’re a completely different thing from a Bali hut.

Bali huts use natural materials like thatch roofing and timber posts. That tropical, resort-style look and aesthetic appeal is something outdoor sheds and standard garden sheds simply can’t match.

So, if you want a space to relax, host guests, or properly enjoy your garden, a Bali hut wins hands down.

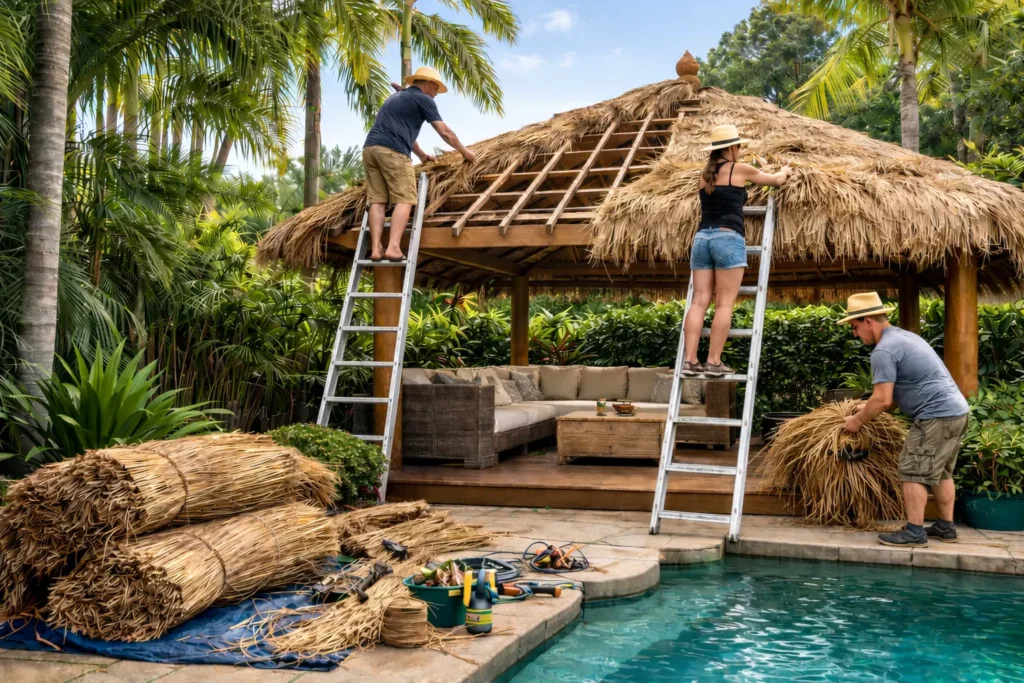
Materials, Build Quality, and What Lasts

The good thing about investing in quality materials is that you won’t be replacing or repairing anything for years. Believe it or not, the difference between a hut that holds up and one that doesn’t often lies in what it’s made from rather than just how it looks.

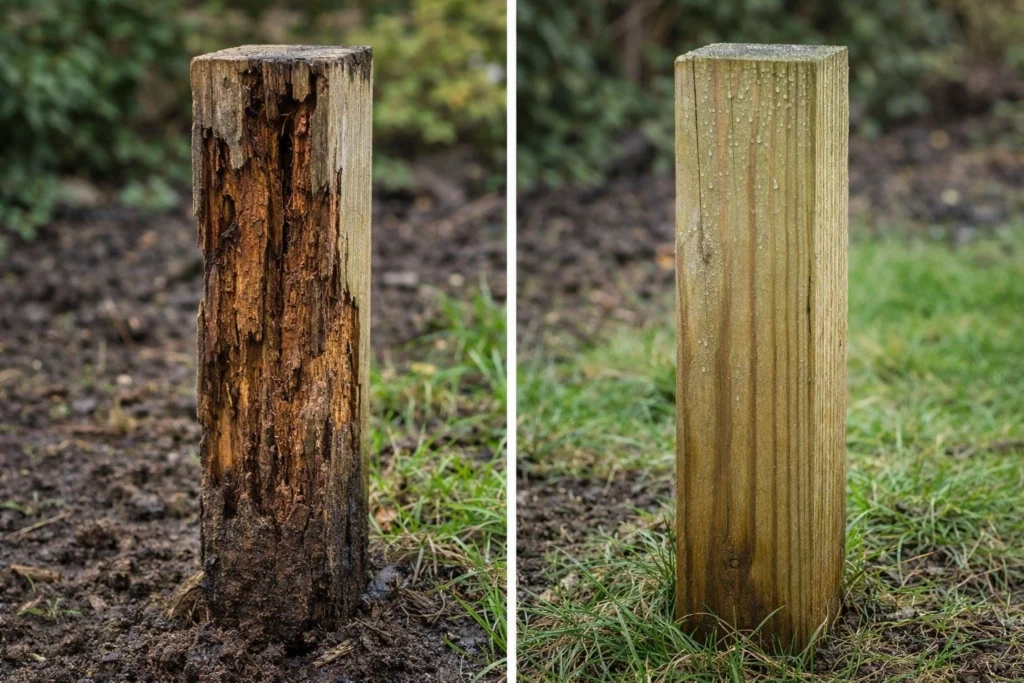
From what we’ve seen on the ground, timber frames made from treated pine resist rot and moisture far better than untreated alternatives (skip this, and you’ll regret it). Besides, this counts a lot in humid Australian climates where damp conditions and wet weather put constant pressure on outdoor construction.

Steel fixings and quality hardware also count just as much as the timber itself. Typically, windows, doors, and roof joints are the spots where weather gets in first. That’s why those need proper sealing and waterproof finishes to hold up through winter and summer alike.

Beyond these, colour and paint choices affect far more than style. In Australia specifically, lighter colours reflect heat better during summer, while darker tones absorb it. That means your colour choice has a real impact on how comfortable the space feels.

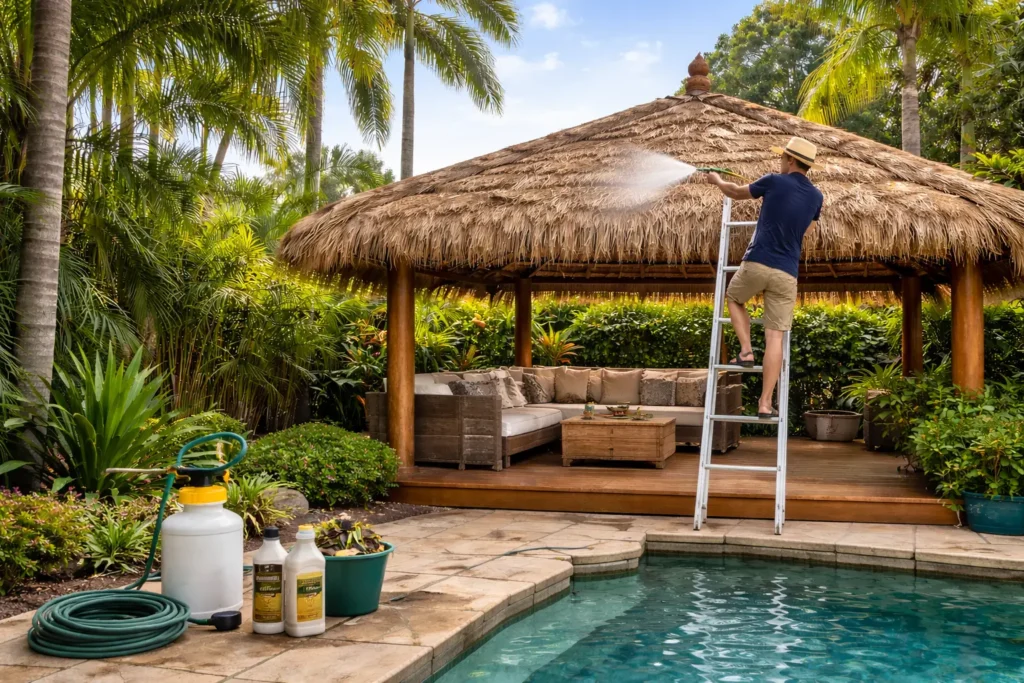
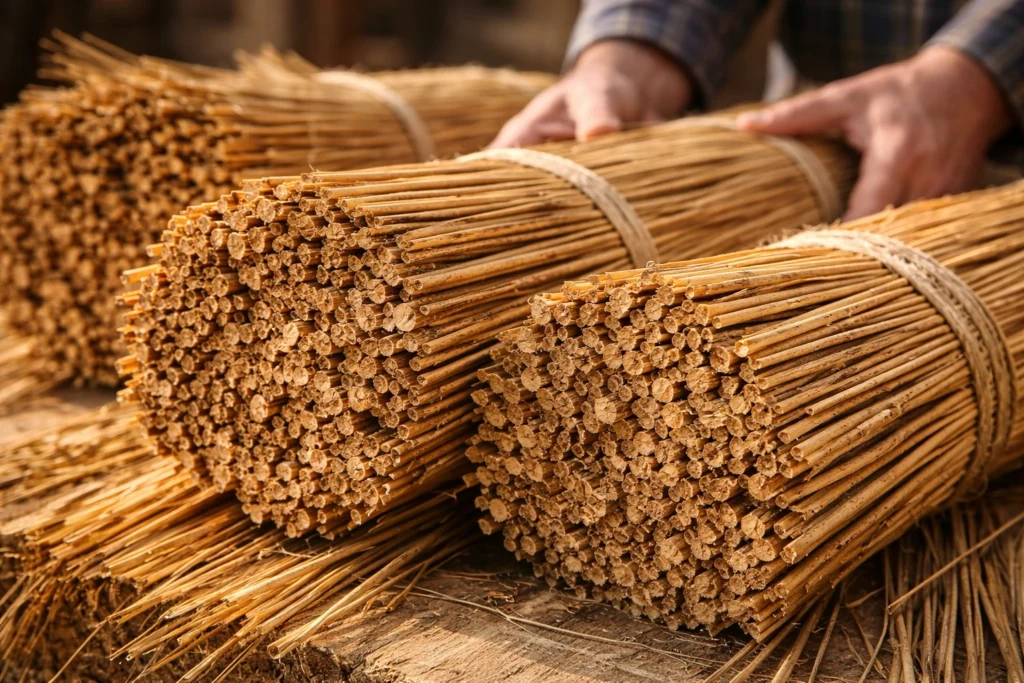
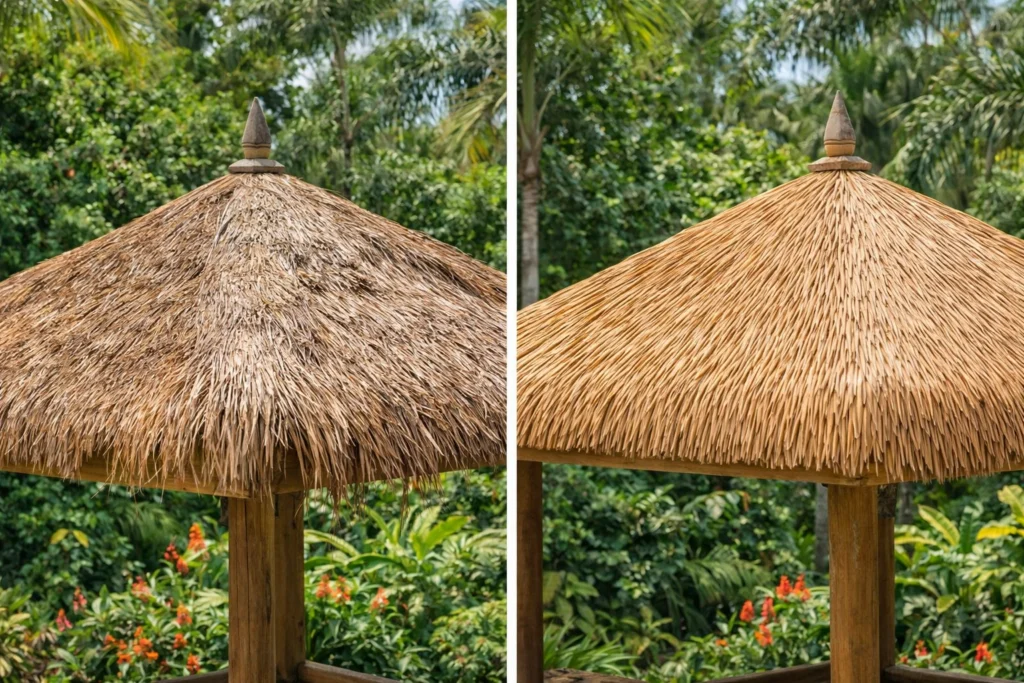
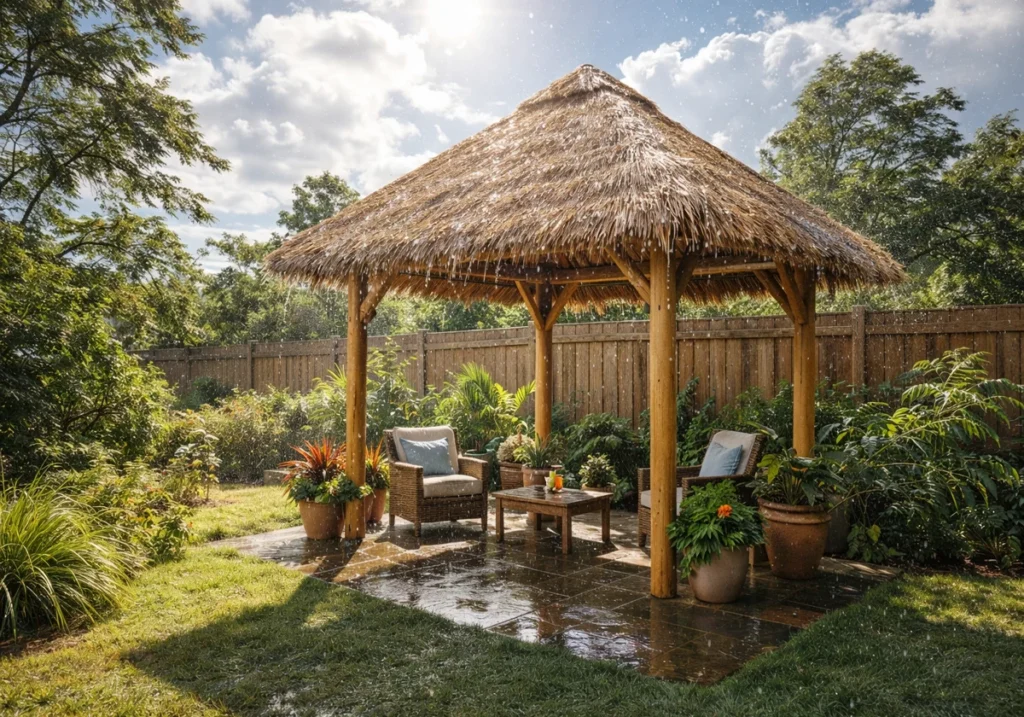
Most importantly, thatch roofing, made from dried palm or grass, adds natural insulation and can drop the temperature underneath the hut by several degrees on a hot day. On top of that, quality thatch has solid durability and handles the Australian climate better than any synthetic material.

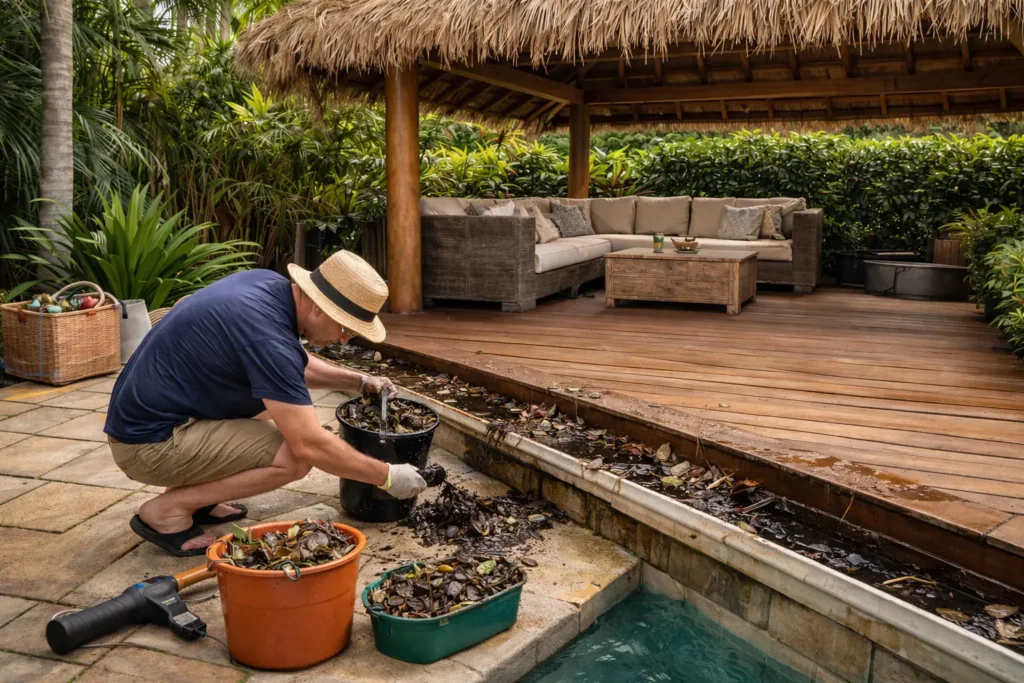
Good construction also means checking the flooring and making sure materials suit your specific outdoor conditions. This way, choosing the right materials from the start significantly reduces maintenance down the track.

Safety Gear, Weather, and Structural Considerations

Safety Gear, Weather, and Structural Considerations

We’ve seen most people focus on looks and forget that a poorly anchored hut is a safety risk waiting to happen. But your property deserves a structure built to handle real Australian weather conditions.

There are two key parts to getting this right. Let’s break down what you should consider for each one:

Safety Gear and Anchoring: What You Shouldn’t Skip

Post anchors, bracket connectors, and concrete footings are the three main components that keep a hut stable in high wind conditions (this one also catches people off guard). If you skip any of these during installation, things can go wrong quickly

Your tools and equipment are important here, too. Basic safety gear like gloves, eye protection, and a spirit level isn’t optional when you’re handling heavy timber frames. They’re what keep the install safe and accurate.

In fact, a hut without proper anchoring can shift or collapse under pressure. Beyond the risk to your garden furniture and outdoor space, it puts your family and guests at real risk, too.

Wind, Rain, and Sun: Building for the Australian Climate

Australia’s climate varies wildly from coastal humidity in Queensland to the cold, dry winters in parts of Western Australia. As a result, material choice needs to match your region and the specific conditions your hut will face.

Besides, thatch roofing sheds water naturally on a 30-degree pitch, which makes it a practical choice for wet and rainy areas. In heavier rain-prone locations, you can also add a waterproof underlayer beneath the thatch, which gives you an extra layer of security through winter.

While snow may not be a concern for most of Australia, wind and summer heat are. In summer, UV exposure chews through cheaper materials fast. That’s why treated timber and quality thatch pay for themselves over time in any sunny Aussie backyard.

Now that you’ve covered structure and weather considerations, step back and compare your two main options side by side before you purchase.

Garden Shed or Bali Hut? A Simple Side-by-Side Comparison

Outdoor Hut Guide: What Your Garden Space Actually Needs

A quick side-by-side comparison between a garden shed and a Bali Hut saves you from buying the wrong structure for your backyard. Homeowners often mix the two up because both sit in the garden, but their purpose and feel couldn’t be more different (a small detail with a big impact).

Here’s a clear breakdown across the most important factors:

FactorGarden ShedBali Hut
PurposeStorage, tools, equipmentEntertaining, relaxing
MaterialsSteel, timber, plasticTreated pine, thatch roofing
StyleEnclosed, practicalOpen-air, tropical
DoorsStandard hinged or slidingOpen or partially open
WindowsSmall, limited natural lightFully open, bright
Colour & PaintWide range of colour optionsNatural tones, timber finish
AccessoriesShelving, hooks, organisersOutdoor furniture, lighting
Cost & PriceBudget to mid-rangeMid to premium range
GaragesOften used as an alternativeNot applicable
SecurityLockable, solid constructionOpen by design
Aesthetic AppealFunctional, plainResort-style, tropical

Bottom line: Garden sheds and outdoor sheds are a no-brainer if the extra storage space is your main goal. They’re practical, secure, and come in a wide range across Australia to suit different property sizes and budgets.

But if you’re looking to create a proper outdoor living space, store nothing and enjoy everything, a Bali hut is in a completely different league. The quality, style, and complete outdoor experience altogether make it a better purchase for most Aussie backyards.

Your Garden, Your Call

Picking the right outdoor hut doesn’t have to be overwhelming. Once you’re clear on your space, your budget, and how you intend to use it, the right choice starts to stand out pretty quickly.

Here’s a quick recap before you go:

  • Match your hut size to your backyard and available space
  • Choose materials built for your region’s weather conditions
  • Think about whether you need storage or an outdoor living area
  • Factor in installation, maintenance, and long-term cost

Remember, your outdoor area has real potential, and the right hut can enhance it in ways a standard shed simply can’t. Whether you’re after a relaxed patio vibe or a full tropical setup, there’s a quality option in the range that suits your property.

At Georgia Wiseman, we build and supply premium Bali huts across Australia, designed to last and built to impress. If you’re ready to explore your options or just want some honest advice, get in touch with our team today and let’s make your backyard something worth sitting in.

Read More

Bali Hut Maintenance Tips: Keeping It Strong for Years

Bali Hut Maintenance

A Bali hut is one of those backyard additions that looks incredible from the day it’s installed. But over time, maintenance becomes something that needs consistent attention. Thatch starts to thin out, and timber frames take a beating from the sun and rain.

If left unchecked, those small issues tend to snowball into costly repairs. We’ve built and maintained hundreds of Bali huts across Australia, and we know exactly where they hold up well and where they tend to fail without proper care.

And this guide covers everything you need. You’ll learn how to clean your hut properly, protect your timber frames, spot damage before it spreads, and know exactly when it’s time to rethatch. Because your hut deserves better than a quick fix.

Cleaning Your Bali Hut the Right Way

Cleaning the gutters of a Bali hut

Regular cleaning is the simplest part of Bali hut maintenance, and it directly affects how long your structure holds up. For instance, most people skip the gutter check until water starts pooling where it shouldn’t, and by then the damage is already done. However, maintaining basic outdoor cleaning routines is one of the easiest ways to add years to your hut.

A good place to begin is with these basics:

  • Debris removal: Clear leaves and buildup from the roof after every big wind or storm. We say this because debris traps moisture against the thatch and speeds up deterioration over time.
  • Chemical-free cleaning: Once the roof is clear, wipe down your timber frames with a damp cloth and mild soap. Avoid anything harsher than that, since strong chemicals strip the timber’s natural protection and leave it far more vulnerable to cracking and UV damage over time.
  • Gutter systems: From there, check your gutters and watch for water pooling around the base (and yes, we know, the gutters are everyone’s least favourite weekend job). After a heavy Queensland downpour, blocked gutters push water back into the thatch layer, and that’s when the slow damage really starts to set in.

These three habits keep your Bali hut clean and protected year-round. Next up, let’s look at your timber frames.

Timber Hut Upkeep: Caring for Posts and Frames

Healthy timber frames are what keep your Bali hut standing strong season after season. We’ve seen it time and again: skipping the annual timber inspection is where most people run into trouble. And by the time damage is visible on the surface, it’s usually been brewing underneath for a while.

Work through these checks one by one:

Check for Rot and Pest Activity

Start at the base of each post, since ground contact is where rot and pest activity tend to show up first. Press gently along the timber, and if it feels soft or spongy, something is likely already going on underneath.

Seal and Protect the Wood

UV rays slowly dry out timber until it cracks and splits, letting moisture in. A quality sealant applied once a year, like the treatments covered in this guide to handling UV exposure and moisture, keeps the wood protected and preserves its longevity.

Tighten and Secure

Loose beams put extra stress on surrounding joints over time. So go through every fixture, bolt, and bracket across the frame, and tighten anything that shifts or feels wobbly.

Keeping your timber frames solid goes a long way toward a long-lasting Bali hut. Weather, though, is another challenge that needs just as much attention.

Weatherproofing Your Outdoor Hut

Weatherproofing a Bali hut roof

Australia’s weather can be brutal, and your outdoor hut takes the full brunt of it. Between scorching summers, heavy rainfall, and coastal humidity across Queensland and NSW, your hut’s materials are constantly under pressure. Weatherproofing is what stops that pressure from turning into damage.

We suggest you start with your timber. Applying the right protective coating to outdoor timber before harsh weather conditions arrive seals out moisture and slows down wear over time. Don’t wait until the timber starts looking tired to do it. Make it a yearly habit.

And while you’re at it, check the roof thatch for gaps or thinning patches, since even a small opening lets moisture in and rot sets in fast (we’re talking weeks, not months). If long-term protection is the goal, synthetic thatch holds up far better against heavy rainfall and needs rethatching far less frequently.

Protection only goes so far, though. You also need to know what to look for, which is just as important.

Spotting Damage Before It Gets Worse

Regular inspections don’t need to take long, and you don’t need any special tools either. A quick walk around every few months is enough to catch most problems before they turn into costly repairs.

Believe it or not, a soft spot near the base of a post is one of the most common early signs of termite activity. So look up at the roof, too. We say this because sagging thatch or patches lifting in the wind mean the layer needs attention sooner rather than later.

Adding to that, timber exposed to repeated wet-dry cycles can lose structural integrity in as little as two to three years, so don’t let it slide.

Damage Sign

Natural Thatch

Synthetic Thatch

Thinning or bare patches

Common after 5 to 7 years

Rare, slower to show

Lifting in the wind

Happens with age

Less frequent

Discolouration

Darkens with moisture

Fades with UV exposure

Rot underneath

More susceptible

More resistant

Timely repairs protect your hut’s structural integrity and extend its longevity. Once you’ve spotted the damage, the next step is knowing when it’s time to rethatch.

The Rethatching Process: When and How to Rethatch

Rethatching the Bali Hut

The rethatching process is something every Bali hut owner will face. A thatch typically lasts five to ten years, though coastal areas near NSW or Queensland tend to wear faster due to salt air and humidity.

When the time comes, here’s how it works:

Step 1: Know When To Act

If more than 20% of the roof surface looks sparse, discoloured, or is lifting in the wind, patching won’t cut it. At that point, rethatching the whole roof is the only way to get properly ahead of it.

Step 2: Strip It Back Completely

New thatch should never go over old, because trapped moisture underneath accelerates rot in the new material from day one. So remove every layer right down to the frame before you start fitting anything new.

Step 3: Fit The New Layer Properly

Starting from the bottom of the roof frame, fit each row of new thatch with at least a one-third overlap over the row below. That overlap is what channels rain downward and stops it from seeping through to the frame.

Step 4: Check Your Edges

Run your hand firmly along every edge once the thatch is in place, and re-secure anything that lifts. Wind always gets its first grip at the edges, so this step is worth taking your time with.

New thatch restores the natural look of your hut and gives your roof solid weather protection for years ahead.

A Little Bali Hut Care Goes a Long Way

A Bali hut takes on a lot from the Australian climate, but with regular maintenance and proper care, it can hold up beautifully for decades. Staying on top of it each season is what protects your investment over the long run.

And it’s really not as overwhelming as it sounds. This guide has walked you through cleaning, timber upkeep, weatherproofing, spotting early damage, and the rethatching process, giving you a clear picture of what your hut needs to stay solid and looking great.

So if you’re ready to take it further, the team at Georgia Wiseman will take you through every step you need to keep your structure in top shape for years to come.

Get in touch today.

Read More

How Quality Materials Affect the Lifespan of Outdoor Structures

outdoor structure materials

Cheap materials force you into repair cycles every few years, which doubles what you actually spend over a decade. The real cost shows up later, not in the price tag, but in ongoing repairs and early replacements.

The mistake starts at the quote stage. Many homeowners chase the lowest quote without checking treatment depth or timber grade. Those generic kits look identical in photos, but they use thinner posts or skip proper treatment. You might save a few hundred now, only to watch sections rot or warp before the ten-year mark.

It gets simpler once you know what makes outdoor structures hold up in Australian weather. Things like treatment depth, timber density, and thatch grade determine whether you’re fixing things every season or leaving them alone for years.

This guide covers the materials that actually last, and the cheap shortcuts that cost you more in the long run. Let’s get into it.

What Quality Means in Outdoor Structure Materials

What Quality Means in Outdoor Structure Materials

Quality in outdoor structure materials is about how well they fight off moisture, UV damage, and breakdown over the years. Three factors usually decide that: density, treatment depth, and water resistance.

First, density affects how much moisture a material absorbs. That’s why denser timber and thatch take in less water when rain or humidity rises, which helps prevent rot and mould over time. Lower-density timber, on the other hand, tends to show soft spots or surface decay after only a few wet seasons.

Treatment depth is just as important. Surface coatings protect only the outer layer of timber, so they wear off relatively quickly under harsh weather. Deep-penetrating treatments sink into the material itself, which allows them to keep protecting the structure for years. The difference often becomes obvious after several seasons, when lightly treated materials start deteriorating while properly treated timber remains stable.

Moisture isn’t the only thing breaking materials down. Constant sun exposure does the same damage. Natural timber usually needs treatment to handle UV exposure, while many synthetic materials build UV resistance into their structure. In both cases, denser materials with thorough treatment typically last longer.

You pay more upfront for that durability, but it shows up later in fewer repairs and replacements. Budget materials often need attention by year five, but quality materials usually keep doing their job with minimal intervention.

Premium Thatched Roofing: Years You Gain from Better Materials

Premium Thatched Roofing: Years You Gain from Better Materials

Not all thatch performs the same when weather exposure tests it year after year. According to the Thatch Advice Centre, water reed can last around 25–40 years, but longstraw thatching typically falls closer to the 15–30 year range.

What separates them? Material quality. Premium thatched roofing uses mature, properly processed plants with tighter bundling and higher natural density. That structure sheds water faster and resists organic breakdown, which is why you see those 40-year lifespans instead of 15.

Grading tells you a lot about how the thatch will hold up. Higher-grade Bali thatching, for example, performs better in humid coastal conditions because the fibres are denser and packed more tightly. Lower-grade thatch may look identical at installation, but deterioration often starts after just a few wet seasons.

Roof pitch is also important. Steeper roofs drain water faster, which reduces how long moisture sits in the thatch. But even with perfect pitch, lower-grade material typically needs patching by year five. Premium thatch on the same roof? It keeps going.

Bali Hut Frames and Posts: How Timber Grade Affects Longevity

Better timber grades save you from replacing posts early and dealing with structural repairs that cheaper timber demands. Here’s what separates timber that holds up from timber that breaks down too soon:

  • Treated Pine with Deep Chemical Soaking: How deep the treatment penetrates decides how long the timber lasts. When it soaks deeper into the wood, it can resist termites and rot for decades, even when sitting directly in the ground. Shallow treatment may look fine at first, but it often fails once moisture and insects work past that thin protective layer.
  • Density and Grain Tightness: Timber that’s denser and has tighter grain doesn’t soak up moisture the way softer, loosely grained wood does. That means posts handle seasonal shifts without warping or developing cracks that let water in.
  • Higher Grades Resist Warping: Better timber grades stay straight as they age instead of twisting or splitting, so you’re not replacing posts years before you should.

The timber grade you choose sets the timeline for how long your Bali hut frame stays solid.

Natural Thatch vs Synthetic Options for Your Outdoor Space

Natural Thatch vs Synthetic Options for Your Outdoor Space

The roofing material you pick for your Bali hut changes how often you’re dealing with repairs. Both natural thatch and synthetic options have trade-offs worth considering:

FeatureNatural Thatch Synthetic Thatch 
Lifespan 15-30 years 15-20 years 
Appearance Authentic tropical look Mimics natural look 
Maintenance Regular care needed Minimal upkeep 
Weather Resistance Vulnerable to humidity, mould Resists moisture, UV fading 

Natural thatch delivers that authentic tropical aesthetic but requires consistent maintenance to hit its full lifespan. Synthetic thatch, on the other hand, sacrifices some authenticity for better weather resistance and low maintenance performance. Your choice depends on how important the look is, your local climate, and how much roof maintenance you’re willing to handle.

DIY Bali Hut Kit Quality: Spotting Materials That Last

Quality kits give you materials that hold up without needing repairs or replacements too soon. When you’re comparing DIY Bali hut kit options, watch for these quality markers:

  • Pre-Treated Timber with Stamped Levels: Quality kits often come with timber that’s already been treated, and the treatment level should be stamped right on the wood. You also want hardware that’s actually built for outdoor exposure, not just standard bolts and brackets that’ll rust out in a year or two.
  • Frame Pieces Without Weak Spots: Check the frame components for big knots, visible cracks, or sections that look thinner than the rest. These weak spots can weaken the whole structure over time, even if everything looks fine during assembly.
  • Suppliers Who Back Their Materials: The better DIY Bali hut kit suppliers don’t just ship you a box and disappear. They tell you exactly what materials you’re getting and offer warranty coverage on the frame and structural components.

These markers help you spot whether you’re getting a kit that’ll hold up or one that’ll have you ordering replacement parts too soon.

Maintenance You Skip When Outdoor Structures Use Quality Materials

Maintenance You Skip When Outdoor Structures Use Quality Materials

Picture two Bali huts built in the same year. One needs resealing every season, while the other just gets hosed off occasionally. Better materials don’t break down as fast, so you skip the yearly sanding, sealing, or repainting that cheap stuff demands.

Spending more upfront means less time and money on maintenance later. Take premium timber, for example. It doesn’t crack or split as quickly, so posts stay solid without needing replacement.

High-grade thatch works the same way. It resists mould and breakdown better, which cuts down on roof repairs. Even the hardware affects how often you’re doing fixes. When it’s built for outdoor use, it doesn’t rust, so you’re not swapping out bolts every few seasons.

Budget materials demand attention by year three or four. But with quality materials, you might not touch them until year ten. That’s the difference between constant weekend projects and just enjoying your backyard space.

Invest in Quality Now, Skip Repairs Later

The materials you choose during construction decide how much work your structure demands in the years ahead. Higher-quality components cost more upfront, but they trade short-term savings for long-term reliability.

That difference shows up in fewer repairs, fewer replacements, and more years actually enjoying your space. A well-built structure doesn’t just last longer. It stays usable without becoming a maintenance project.

If you’re planning a build, reach out to Georgia Wiseman about materials that balance budget with durability in Australian conditions. Choosing well now protects your structure for the long run.

Read More