Category Archives: Bali Hut

How Much Space Should You Leave Around a Bali Hut?

Leave at least one metre of clear space around a Bali hut, and allow extra clearance near pools, fences, and walkways. The space gives the thatch room to shed water while leaving enough access to walk around, clean the area, and check the posts.

Most backyard plans come unstuck when people measure only the roof frame and forget the thatch extends past it. At Georgia Wiseman, we see this mistake leave an otherwise relaxed outdoor space feeling cramped.

With that in mind, this guide covers clearance distances, Bali hut size options, and the access checks that keep installation day moving. Let’s get into it.

How Much Clearance Does a Backyard Bali Hut Need in Australia?
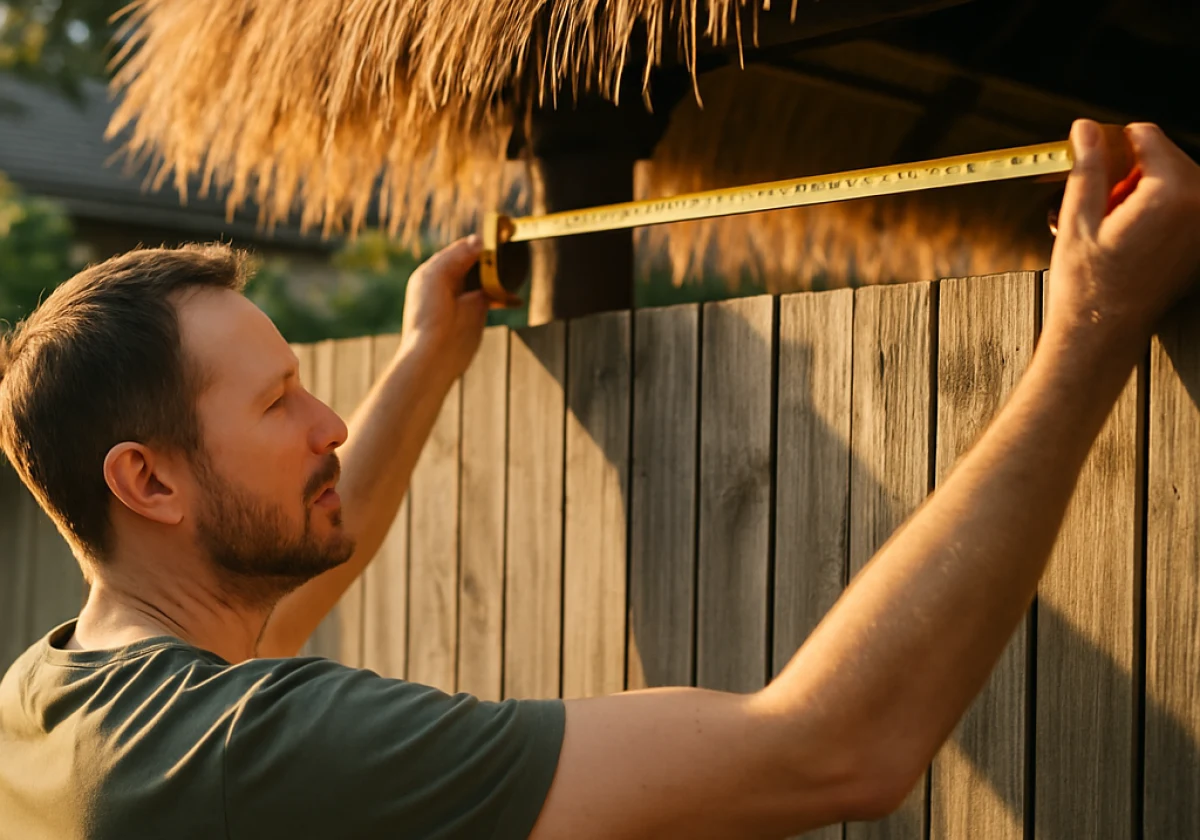
Homeowner measuring the one-metre gap between weathered wooden fence

As we mentioned earlier, Bali huts need at least one metre of clearance on every side, with extra room near boundaries and pools. Australian blocks keep getting smaller these days, so that single metre often decides whether your hut feels like a backyard retreat or a roadblock.

For most yards, three measurements determine whether that clearance works: the fence line, the headroom above, and the walking space at ground level.

How Close Can a Bali Hut Sit to the Fence?

Councils generally ask for 900 mm between a structure and the boundary. That’s why we recommend a full metre from the fence to the outer edge of the thatch. That extra width lets you reach every post without crushing the roofing against the palings.

In this case, measure from the thatch edge rather than the post, because African thatch usually overhangs the frame by 400 mm to 500 mm. Rain runs off that edge all season, and soaked palings rot years earlier than dry ones (your neighbour will spot the rot before you ever do).

Many councils also treat structures above ten square metres as outdoor structures needing approval. Check your local rules before you order, because one phone call beats shifting a finished hut by hand. You’re free to ring your council or us for any confirmation.

Overhead Room: What a Thatch Roof Needs Above It

Clear the sky above the roof as carefully as the ground around it. Leaves that collect on a Bali hut’s thatched roof hold moisture and keep the roofing damp for longer, so aim for two metres of open air above the crown.

We’ve often seen that gum trees cause the most trouble in Australian yards. They drop bark and limbs that tear at the thatch all year round. We’ve pulled apart more than one hut where a single branch caused five seasons of slow damage, and synthetic thatch only delays that problem.

Even with good overhead clearance, thatch copes with our high UV rays better than most roofing, but trapped damp still rots it from beneath. Powerlines and eaves need the same check. While aiming for two, keep at least 1.5 metres between the roof crown and anything fixed overhead to protect airflow (hot air has to escape somewhere, and it always does).

Leaving Space for Furniture and Foot Traffic

Furniture eats clearance faster than anything else. It’s a good idea to keep around 800 mm between your outdoor furniture and the posts. Give a timber deck the same gap at its edge, too.

To give you an idea, a six-seat dining setting needs about 1.2 metres of pull-back room behind the chairs. Paths count as well, and a 900 mm footpath running past the hut keeps traffic moving without anyone brushing the bamboo screening.

A simple walk-through helps put those measurements into practice. Picture yourself carrying a tray of drinks from the back door to the seating area. If you can make that trip comfortably with people seated around you, the entertainment area has enough room for everyday use.

Bali Hut Size Guide: Matching Dimensions to Your Outdoor Spaces
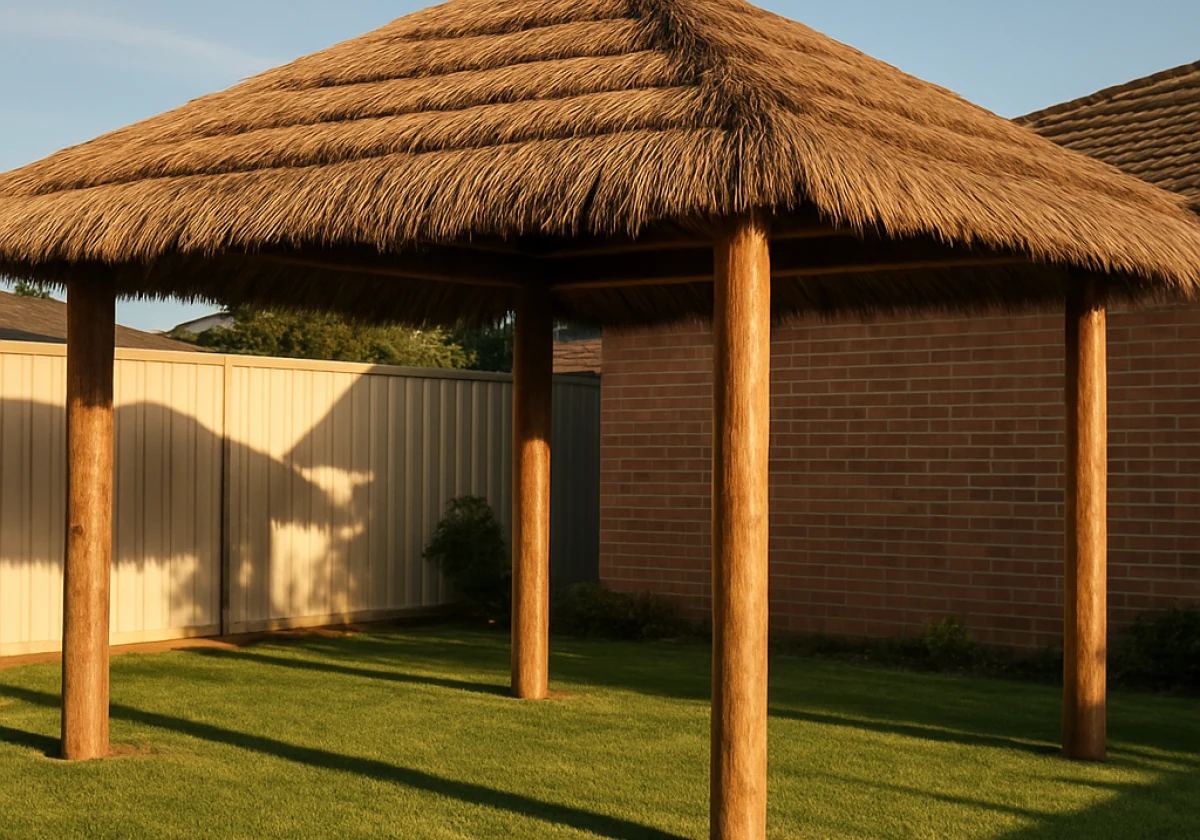
Wide-angle ground-level view of a 4x5 metre Bali hut

With clearances sorted, size becomes the next decision, and Bali huts come in a variety of sizes built around standard roof dimensions. Buyers often pick a hut by its roof footprint and forget the thatch overhangs the posts by half a metre.

Compare the common Bali Hut dimensions below against the space you actually have.

Roof sizeFootprint with thatchSeatsSuits
3×3 m4×4 m4Small courtyards
3×4 m4×5 m6Standard suburban backyard
4×5 m5×6 m8Perfect for poolside lounging
5×6 m6×7 m12Large entertaining decks

A Bali hut 4×5 suits most family blocks, though we’d measure twice before committing to anything under 300 square metres (a tape measure costs far less than moving a hut). Add your clearance to the footprint column rather than the roof size, because sound Bali hut design starts at the thatch edge.

The same measurement method applies to a Colorbond gazebo, a cedar shingle gazebo, or a double roof Bali hut. In each case, measure the full roof footprint before adding the required clearance.

Bali Hut Design Around Pools and Boundaries Needs Extra Clearance
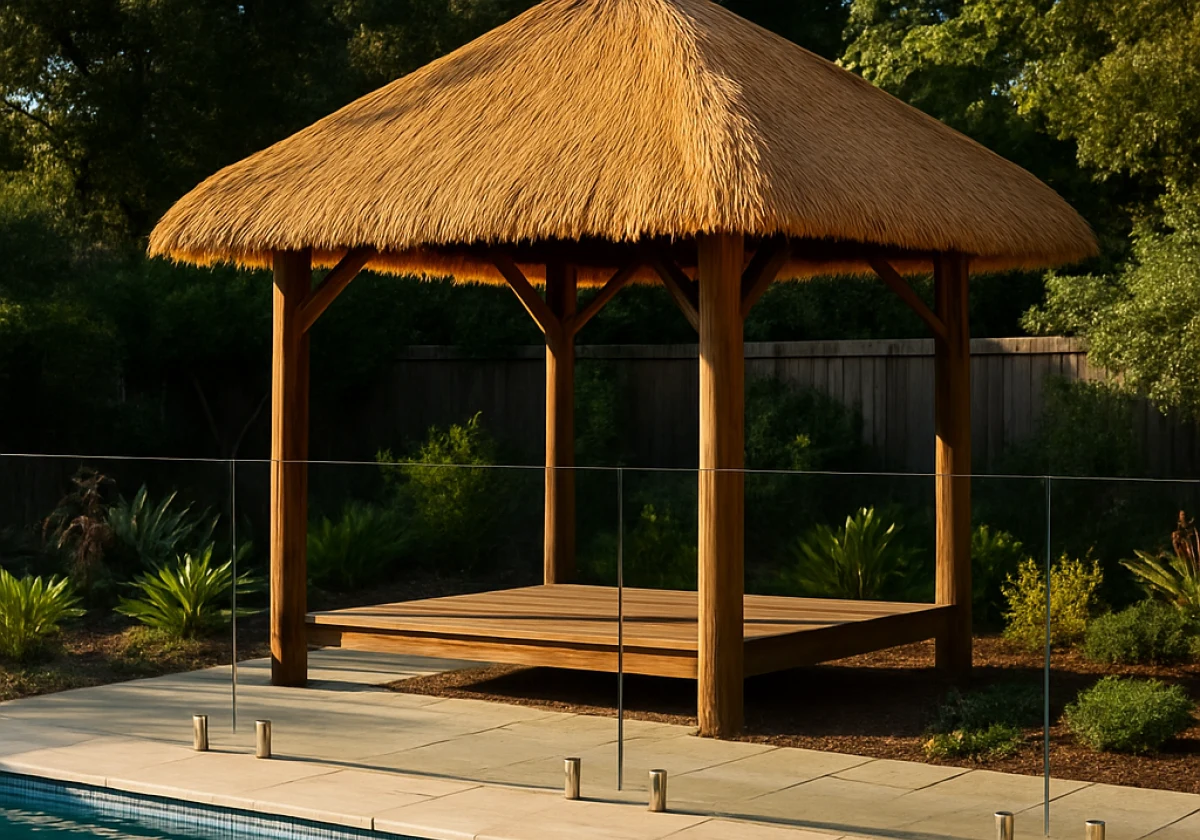
Bali hut with timber frame and golden thatch positioned

Sorting pool and boundary clearances early saves you from council headaches and a costly shift later. Pool barrier rules apply across Australia, and a Bali hut near a pool must meet the relevant clearance requirements.

Run through these four checks before you lock in a position:

  • Pool Fence Distance: Climbable structures must sit 900 mm clear of any pool fence. It’s best to keep every post outside that zone. Furniture inside the hut counts too when it sits within reach of the barrier.

  • Boundary Setbacks: Councils across Australia set their own setbacks for backyard structures such as a gazebo or Bali hut. Check your local council requirements rather than copying the neighbour’s build.

  • Splash and Drainage: Water pooling under the posts rots base plates within a few seasons. Grade the paving away from the posts, so rain and pool water drain away rather than collecting around the base.

  • Overhead Services: Make sure no power line or service cable crosses the roof footprint before installation day. Energy providers set minimum distances, and ignoring them stops the job on the spot.

Your council planning page lists the requirements for your property. Check those figures before settling on a position. You can contact us with those measurements once you have them.

Smart Bali Hut Installation Starts Before the First Post Goes In

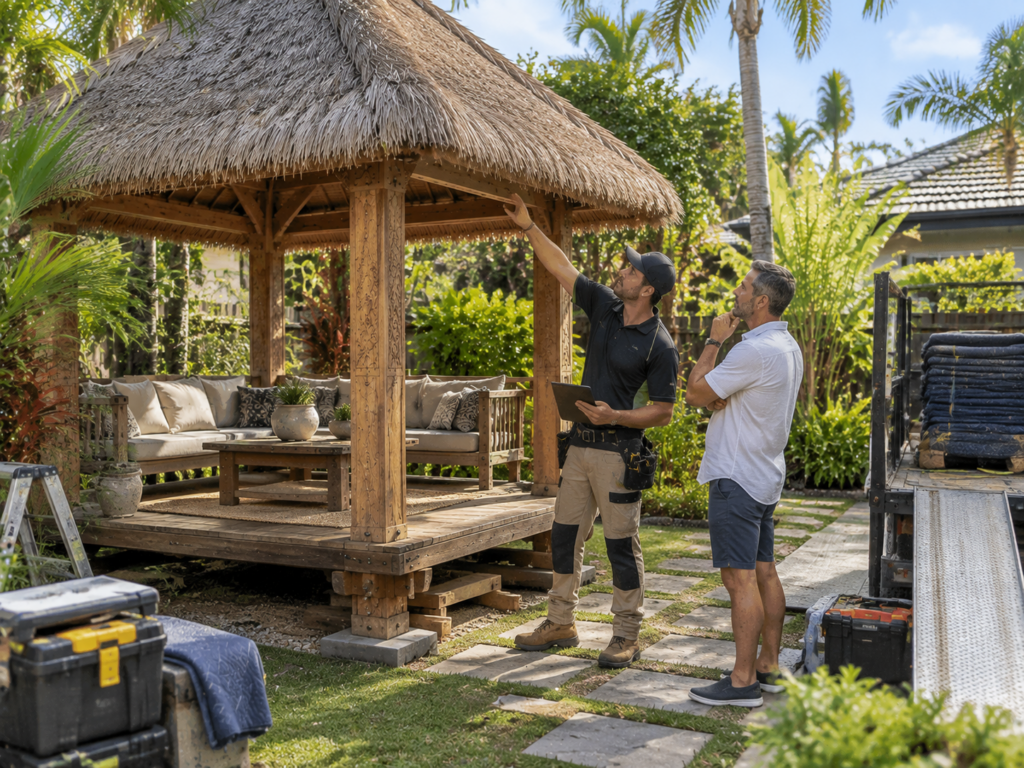
Plenty of Bali hut installations stall on day one because nobody measured access for machinery and materials. Your standard side gate at 900 mm won’t pass a six metre ring beam, and the crew ends up walking timber through your hallway.

So measure your narrowest access point first, then compare it against the longest piece in the kit. Posts usually run between 2.7 and 3 metres and are easier to manoeuvre through a normal side gate. Longer rafters on a timber Bali hut gazebo need more room to turn through narrow access points.

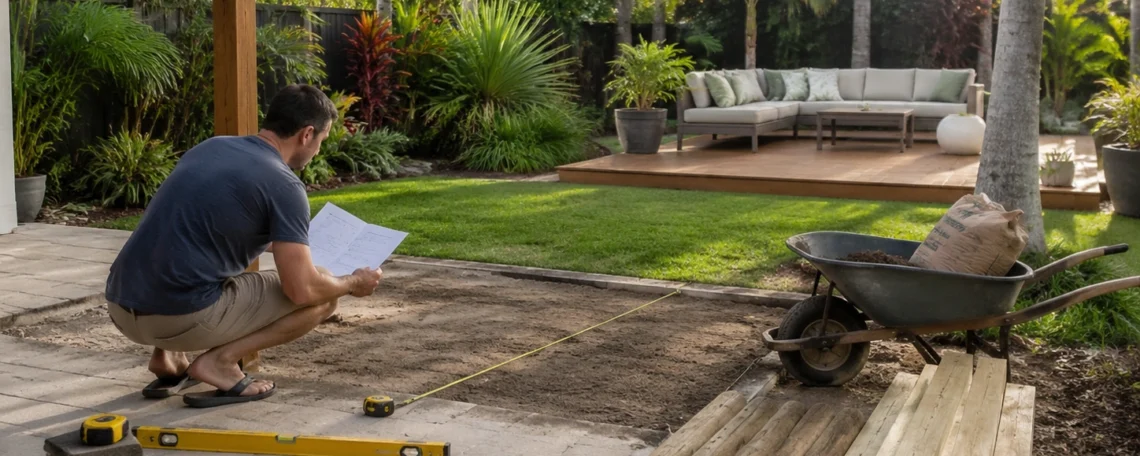
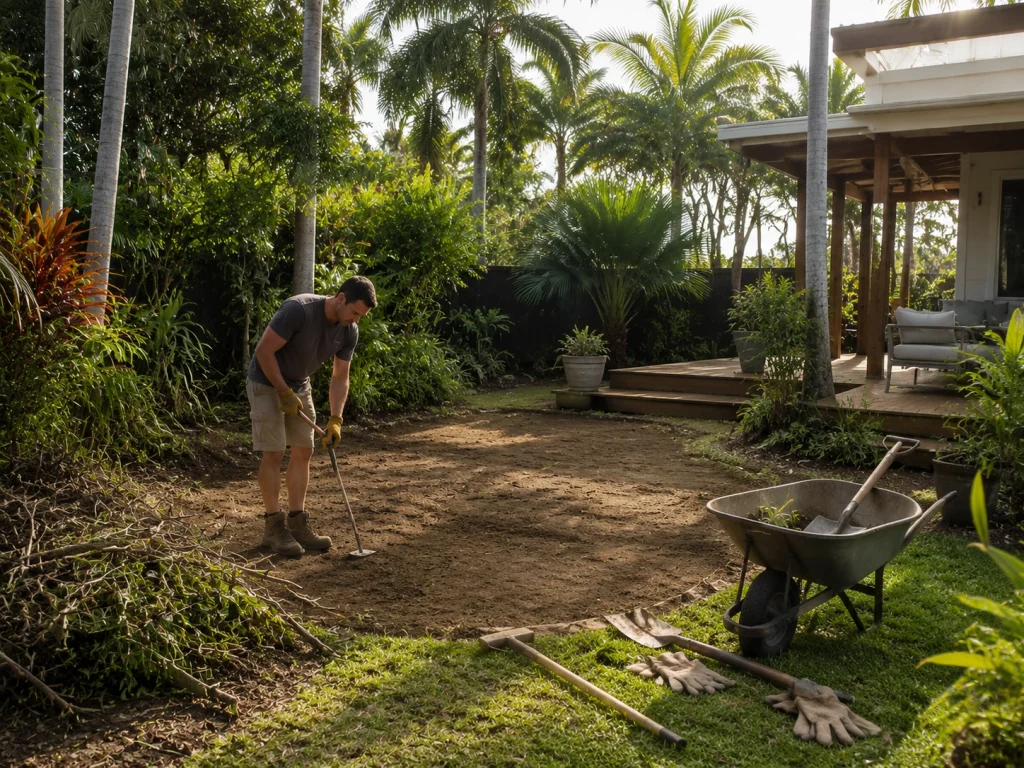
Ground preparation is important too, because the frame needs a level base within 10 mm across the whole slab. We’ve installed on sloping blocks around the Sunshine Coast where the fall needed a retaining step before a single post went in.

You’ll also need about 4 square metres of dry, flat space to store thatch bundles before installation. Wet reed gets heavy and can stain the timber underneath it.

Apart from that, leave enough room around the hut for the crew to work. If we could add one line to every plan, it would be a two-metre working perimeter. Thatching crews work around the outside of the frame, and they need room to carry, position, and secure each section of roofing.

Ready to Plan Your Backyard Bali Hut?

Space around the structure affects how comfortable and practical your Bali hut feels once it’s built. One metre of clearance on every side gives you room to walk around the hut, maintain the posts, and keep the thatch clear of nearby structures.

Before you order anything, measure your block and mark the full footprint with string, including the thatch overhang. Then walk around the marked edges to make sure you still have enough room for furniture, paths, fences, and other backyard features.

Georgia Wiseman supplies quality Bali huts and Gazebo kits for Australian homes. Contact us to check your planned clearances and discuss delivery and installation dates.
Read More

Poolside Bali Hut Planning: How Far Should the Splash Zone Reach?

Your Poolside Bali Hut's Water Damage Prevention Guide

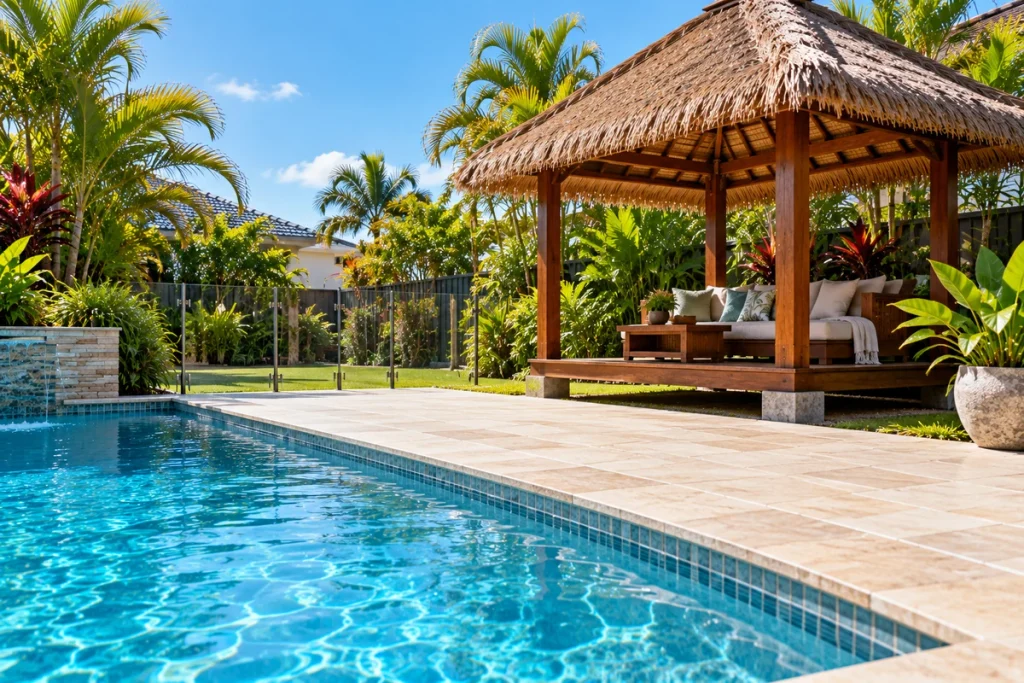
Your poolside Bali hut should sit at least one metre back from the pool’s edge. That metre keeps splashed water off the timber posts, and it leaves you dry ground to walk on between swims.

Despite that, most owners pick a spot by eye. Then they notice the poles darkening after one hot summer. Georgia Wiseman fields that call often, usually once the timber has started to lift and stain around the base.

Here’s the thing. Placement costs nothing to get right and plenty to get wrong. This guide covers splash distance, council setbacks across Australia, and the questions buyers ask before they order.

Splash Zone Distance Affects Your Poolside Bali Hut’s Lifespan

Plenty of Australian homeowners set their hut by eye and only think about splash once the timber starts to rot. Water travels further than a quick look suggests. Kids bombing into the deep end every afternoon in January will prove it.

For context, the Bali hut design came from Bali, Indonesia, where thatched pavilions shade tropical gardens and open onto lush greenery. Your hut, however, has to survive beside a chlorinated backyard pool.

When a Bali hut sits too close, three things suffer: the timber, the paving, and your repair bill.

Water Damage and Timber Decay Near the Pool

Water Damage and Timber Decay Near the Pool

Chlorinated water soaks into the base of each post and can stay there. The grain softens, and rot can set in within two or three seasons. We’ve pulled apart huts where the bottom 100 mm of every post had gone spongy while the timber above it stayed sound.

The same spray also keeps the fixings damp. Over time, cheap bolts can rust and leave streaks running down the timber (galvanised hardware handles this far better).

In this case, keeping one metre of dry ground protects your hut better than any sealer you brush on after the damage has started.

Why Do Wet Pool Edges Become a Slip Hazard?

Wet pool edges turn slippery because splashed water sits on smooth pavers, mixes with sunscreen, and carries off swimmers’ feet. Under the hut’s shade, that wet surface can also take longer to dry while people continue walking across it barefoot.

Placement can make that problem worse. If you set the hut tight against the water, swimmers will have to cross the wettest strip of paving whenever they move between the pool and the hut. Put your chairs and daybed there too, and people will have to repeatedly walk across that slippery area to sit down or get back into the pool.

Just a little distance changes that walking path. Move the hut back, and swimmers can cross the splash zone before they reach the seating area. It gives water more room to stay away from the space where people gather. Plus, the chairs and daybeds are now off the wettest part of the paving.

How Long a Well-Placed Bali Hut Will Stay in Good Condition

A well-placed Bali hut can last 15 to 20 years in an Australian backyard. Plan on refreshing the thatched roof somewhere around the 8 to 10 year mark, though.

Huts left in the splash line tell a different story. Expect post repairs by year five, and that labour costs more than repositioning ever would. Plenty of owners learn it the hard way.

Bottom line: The metre of lawn you give up now buys close to a decade of extra service (the cheapest upgrade you will ever make).

How Far Should a Bali Hut Sit From the Pool Edge?

How Far Should a Bali Hut Sit From the Pool Edge?

As we were discussing, a Bali hut should sit at least one metre from the pool’s edge, with two metres ideal for splash-heavy pools. That first metre handles ordinary swimming. The second gives you extra distance from spray caused by diving, slides, and anyone doing laps with a heavy kick.

Every Bali hut by pool needs a second clearance too, and that’s the roof overhang. Thatch usually runs 300 to 500 mm past the posts on most designs. Measure from the outer edge of the thatch, or the finished roof could sit closer to the pool than the post position suggests.

Water features change the sums again. Spillways and fountains can carry mist further once an afternoon breeze picks up. One client shifted a three metre round hut back another 600 mm for that reason, and the staining stopped within a season.

Ground fall counts as well. Runoff heads for the lowest point, so a hut sitting downhill from the pool can collect water running across the paving. We suggest watching where puddles form after a storm, then set your posts on the higher side of that line.

Check the shade line last. The sun sits lower later in the afternoon, and moving the hut further from the pool changes where its shade falls. On a small private pool, a two metre setback can still leave a clear walkway on three sides (measure it with a tape, not your eye).

Council Setbacks for a Pool Shade Structure: What Australian Homes Require

The number of home pools in this country is about 1.2 million, so plenty of backyards have structures sitting close to water. However, you need to check with your council before you order anything.

Requirements vary by state and council, and factors such as floor area, roof type, height, and location can affect whether approval is needed. Honestly, ten minutes on the phone can save you from changing the structure or its position later.

Here’s a brief on the rules set by the councils of each state.

StateMinimum setback from the pool barrierPermit requirement
NSW1 m clear of the fenceExempt under 25 m², otherwise a development application
VIC1 m clear of the fenceBuilding permit once you pass 10 m²
QLD900 mm clear of the fenceBuilding approval once you pass 10 m²
Western Australia1 m clear of the fenceBuilding permit for structures over 10 m²

Confirm the details locally before fixing the hut’s position, because the requirements can change with your property and proposed structure. You can also send your council or certifier’s requirements to our delivery and installation crews, and we can set the footprint to suit.

Answering Frequently Asked Questions About Poolside Bali Huts

These are the questions Australian buyers ask most. Nearly all of them come up at the quoting stage.

  • Distance From a Private Pool: Allow at least one metre for a standard swim area, and more room anywhere the splashing runs heavy.

  • Council Approval: Approval requirements depend on the structure’s size, design, location and the rules that apply to your property.

  • Small Backyard Options: Round designs suit tight surrounds, and a 2.4 metre hut can fit a courtyard while leaving room around the paving.

  • Staying Cool in Summer: Thatch blocks harsh sun and holds very little heat, which is why it is widely used for shaded outdoor areas in places such as Nusa Dua.

  • Delivery Timeframes: Most huts arrive and go up within one to two weeks, depending on weather, site access, and any required approvals.

In short, give the water enough room, check the rules that apply to your property, and pick a size that fits the space you have. That way, you reduce the risk of placement problems, approval delays, and changes during installation.

Plan Your Bali Hut Placement Before You Build

Placement affects how long your hut lasts, and one metre of clearance can protect more than the timber alone. Get that distance right, and you can keep the posts drier, reduce slippery paving, and give swimmers more room to move.

So measure your pool surround this weekend. Mark the roof line with string and check the council rules before you commit. An hour spent measuring now can save you from moving or rebuilding the hut later.

Ready to shade your pool? Georgia Wiseman builds and installs Bali huts for homes right across the country. Contact us for sizing advice and a delivery date that suits your build.

Read More

Bali Hut Drainage: Where Should Rainwater Go Around the Base?

Bali hut drainage

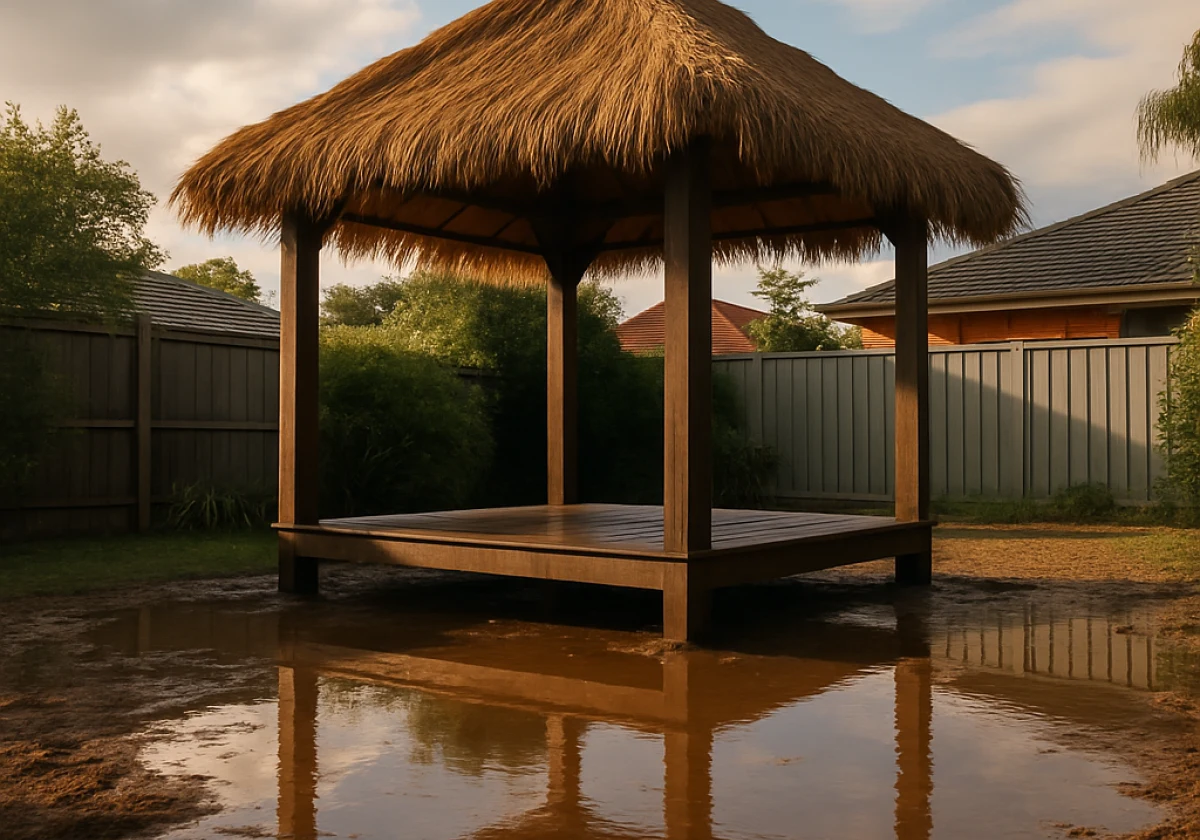
Rainwater around your Bali hut base should drain into a gravel trench, a garden bed, or your stormwater system. If water cannot drain away from the base, it can collect around the posts, soak into the timber and leave the surrounding soil wet.

This drainage problem often becomes obvious during heavy rain, when water starts pooling around the hut base. At Georgia Wiseman, we hear from owners every wet season after they notice water collecting around their huts.

This guide covers why water gathers, which options suit a backyard, and when to address them during installation, so your hut stays well-drained and protected. Let’s get into details.

Why Does Water Pool Around Bali Huts After Heavy Rain?

Bali hut in an Australian suburban backyard after heavy rain

Water pools around Bali huts when the ground slopes toward the base or the soil drains too slowly. Generally, clay soil holds water instead of letting it soak through, and much of the eastern seaboard sits on some version of it. So the rain running off your thatched roof reaches the ground and simply stays where it lands.

Roof size makes water pooling significantly worse. A 4m by 3m Bali hut, for instance, covers around 12 square metres of roof area and can shed roughly 240 litres of water along its edges during a 20 mm downpour. Sydney alone averages around 1,200 mm of rain a year according to the Sydney Weather, and every millimetre of that rainfall has to go somewhere.

Another factor is how nearby garden features affect drainage. Many backyards place Bali huts near water features, bird baths and garden beds, with bamboo fencing separating different areas. And bamboo fencing across the natural drainage path can slow water moving away from the hut. If you leave it without fixing, that trapped water softens the footings and works into the timber from below (mud stains on the posts give it away).

Giving that water a clear route away from the hut helps prevent it from collecting around the posts. Owners who skip this step often end up dealing with the same puddle every winter.

Gravel Trenches, Garden Beds and Stormwater Pits: Outdoor Structure Drainage Options

Bali hut installation site with exposed earth and graded slope

Most owners only pick a drainage option after the puddles appear rather than before the first storm hits. Moving to the fix itself, each option suits a different soil type and a different budget.

Weigh up these three options that cover nearly every backyard.

OptionBest forWhat it involves
Gravel trenchRoof runoff at the drip line300 mm strip of 20 mm gravel, simple DIY
Garden bedLight runoff, sandy soilMulched planting, suits a Bali garden with vase pots
Stormwater pitHeavy runoff, clay soilPipework into existing drains, a plumber’s job

Simply put, the gravel trench handles most backyard huts on free-draining soil, while clay blocks need the pit to shift the volume. So run both together when your yard sits at the bottom of the slope.

Bottom Line: Outdoor structure drainage is about capacity first and looks second.

Planning Drainage During Your Bali Hut Installation

Close-up ground-level view of a Bali hut's wooden post

Sorting drainage during Bali hut installation saves you digging up pavers and garden beds later on. With the site already open, the trencher is there, and the posts aren’t sitting in concrete yet.

Most DIY kits ship with installation instructions for the frame and the roof, though few of them say a word about where the water ends up.

In this case, three jobs deserve your attention while the ground stays exposed.

Grading the Site So Water Runs Away from the Posts

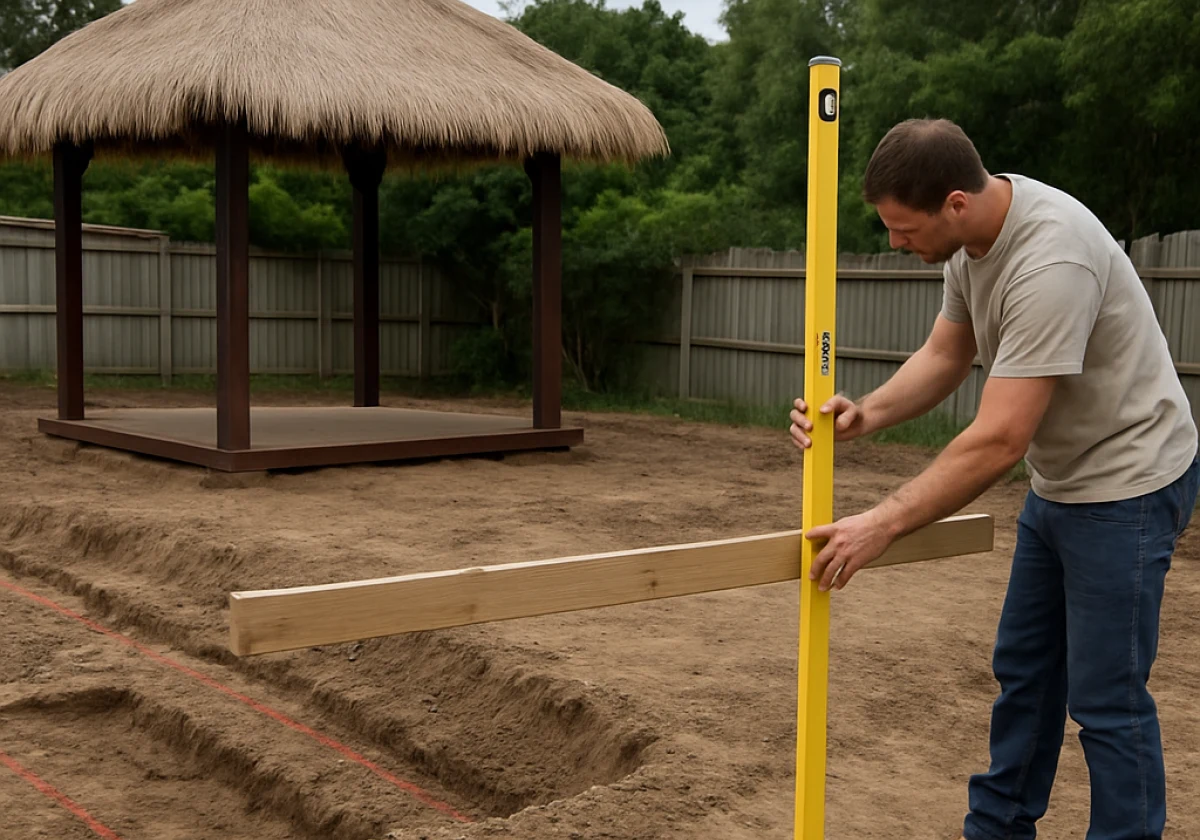
Grade the ground away from the hut at roughly 25 mm of fall per metre for the first two metres. That slope stays comfortable underfoot and still carries water off the base.

You can even check it with a spirit level on a straight length of timber rather than trusting your eye, because a shallow back fall stays invisible from standing height.

Once you get that fall wrong, every storm sends the runoff straight back at the posts (we re-graded one Gold Coast site twice).

Adding a Gravel Drip Trench Under the Cape Reed Roof Edge

A 300 mm-wide trench directly under the roof’s drip line gives runoff somewhere to drain. You need to fill it with 20 mm gravel to just below the surface. Gravel catches the sheet of water coming off the thatch and lets it soak down, instead of splashing mud back onto the posts and screens.

Honestly, this is the first change we’d make on any existing hut, since a weekend with a mattock beats replacing hardwood later.

When to Check with Your Local Council About Stormwater Rules

Check with your local council before directing Bali hut runoff into the stormwater system, altering drainage near an easement, or carrying out work that could affect neighbouring properties. Council requirements vary between areas, so confirm the local rules before you start.

Councils generally treat a roofed structure over a set floor area as work that needs approval. And the drainage plan forms part of that application, especially where the hut sits close to a boundary.

More importantly, a call to your council’s planning team can clarify which approvals apply before you start. Ask about boundary setbacks at the same time, especially when the hut sits close to a property line.

Good Backyard Drainage Protects Your Thatch, Timber and Decking

Now that we’ve covered the groundwork, here’s how backyard drainage keeps the hut itself in good form. You’d be surprised how much of our repair work traces back to one wet corner of a yard.

Four parts of the build feel the difference first.

  1. Posts and Footings: Standing water rots the base of hardwood posts even where installers set them in concrete, because moisture collects in the joint. Meanwhile, dry footings hold the stability and durability the frame was designed around.
  2. Thatch and Roof Edges: Splashback drives grit into the lowest layers of bali thatch, and damp cape reed breaks down years ahead of schedule. In this case, keeping the ground under the eaves dry reduces that moisture exposure and helps protect the thatching grass and tie wire.
  3. Bamboo Panels and Screens: These stay fixed near the ground and can wick moisture from wet soil. Over time, that moisture can soften the base and affect their appearance.
  4. Decking and Pavers: Wet ground under a deck lets bearers settle unevenly, so boards cup and pavers rock underfoot within one season.

Quick Tip: Walk the perimeter the morning after the next storm and mark every patch still holding water. Those marks show you exactly where to dig, and ensure you check them again after the following downpour.

Get Your Bali Hut Drainage Sorted Before the Next Downpour

Rainwater around a Bali hut only causes trouble when it has nowhere to go. But when you give it a route, the posts, thatch and decking all last the way they should.

Walk your yard before the next downpour and decide where that water should end up. A trench dug on a free Saturday costs far less than replacing roof structures later, and drainage handled at the start never needs doing twice.

If you’re planning a Bali hut, think about drainage before installation rather than after the first heavy rain. Georgia Wiseman can help you consider the hut position and surrounding area as part of the setup. Get in touch with our team if you need guidance before installation.

Read More

When Timber Meets the Ground: What Bali Hut Owners Should Know About Termite Risk

Bali hut drainage

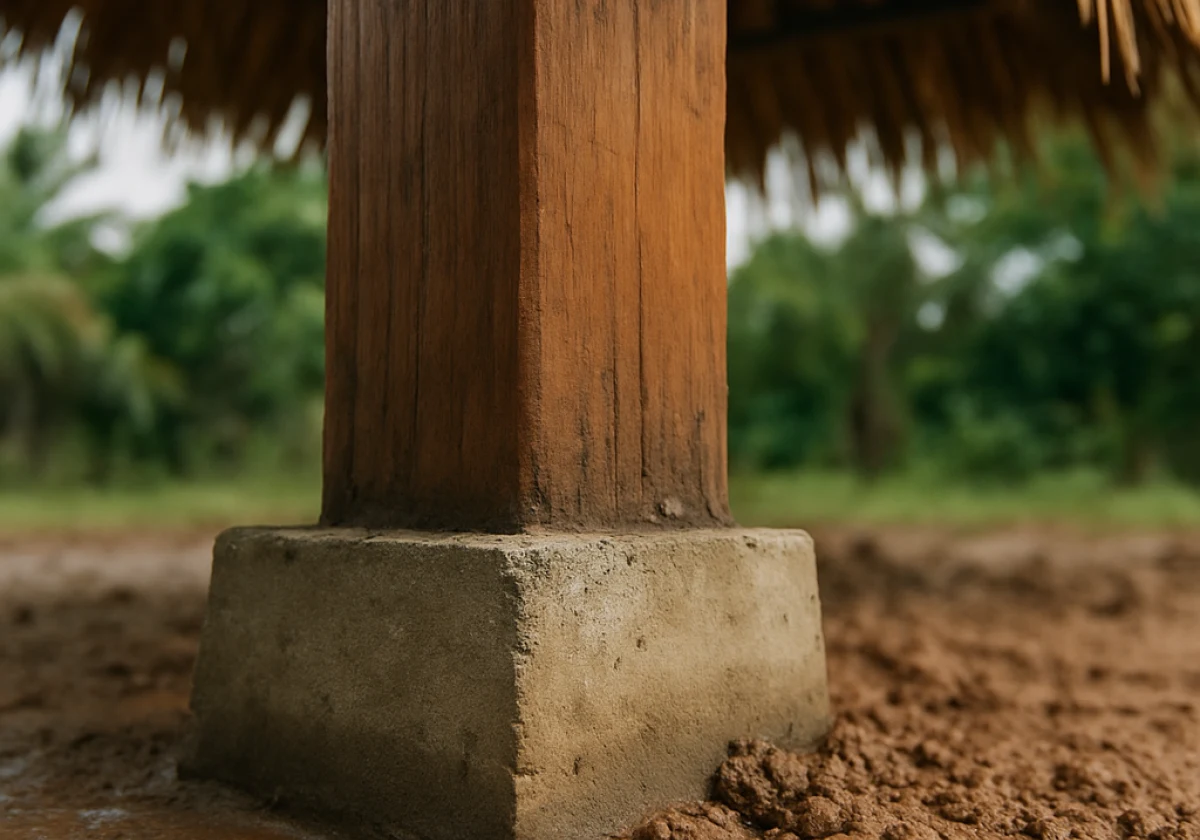
Bali hut termite risk starts where timber meets the ground, because that single contact point gives subterranean termites a direct path straight into your posts. They travel up through the soil, reach the timber, and start feeding well before the outside of the post shows a mark.

Most owners only think about this after the thatch sags or a post shifts under a gentle push from one hand. That timing hurts, since an early fix costs a fraction of replacing the frame and re-thatching the whole roof.

This guide covers the warning signs, the protection options, and the maintenance habits that keep your Bali hut standing for decades. Let’s get into it.

Why Are Bali Huts So Attractive to Termites?

## Why Are Bali Huts So Attractive to Termites- generate the image

Bali hut termites get their start where timber meets the ground. That one contact point gives subterranean termites a straight path into your posts, and they feed for months before the outside of a post shows a mark.

Most owners only look closely after the thatch sags or a post shifts under one hand. Honestly, that timing hurts. An early fix costs a fraction of replacing the frame and re-thatching the roof.

Timber and thatch sitting in soil hand a colony shelter, moisture and food in one spot. Termites are social insects, so a single nest can send thousands of workers at that free meal. Three weak points explain most of the damage.

Subterranean Termites Love Ground Contact

Subterranean termites nest below ground and travel through soil to find food. A post buried in dirt gives termites a free entry point.

Termites target wood for the cellulose it contains, and damp softwood is the easiest meal around. For this reason, footings deserve more attention than the roof above them, since a post set directly into the ground stays wet for days after rain.

Across the huts we have repaired around Brisbane, the posts sunk into soil always fail first (the roof usually outlasts them by years).

Does Bali Hut Thatch Attract Termites Too?

Natural Bali hut thatch rarely draws termites on its own, since alang alang and cape reed are grasses rather than wood. However, the timber frame underneath is what attracts them.

Worn thatch causes the problem indirectly, because a leaking roof soaks the timber frame and keeps it damp for weeks at a time.

Most thatch that Bali hut owners buy today is either natural grass or a synthetic Bali panel. Both types shed water reliably when the installer laps each panel correctly, so the joints are the first place to check when a leak appears.

The Weak Links: Posts, Footings and Hidden Timber

Posts, footings and hidden timber cause most failures, and each one hides the trouble until the structure starts to move.

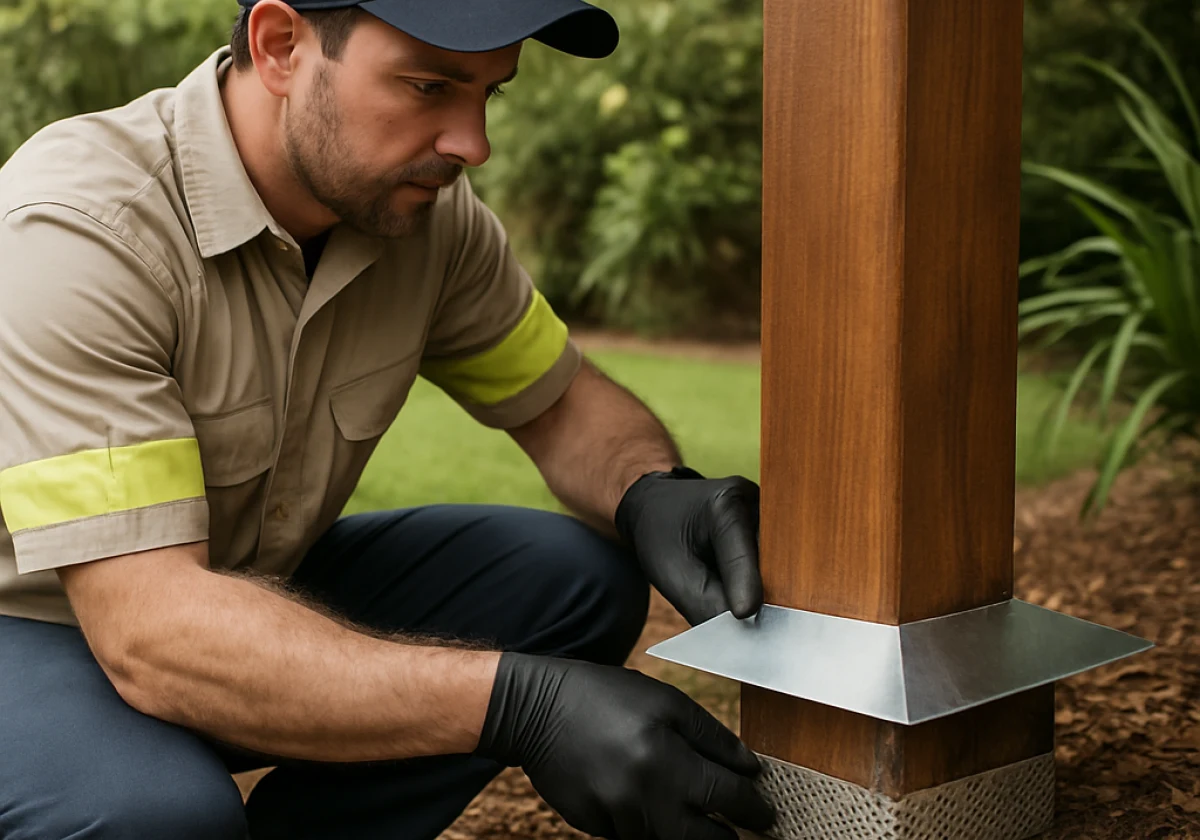
Stirrups lift every post off the slab so the timber never touches soil, and stainless steel fittings stop rust from opening gaps. Many Bali hut kits ship with untreated frames, and soft coconut pine gives a colony an easy meal.

Check the hidden pieces too. Bearers, handrails, and roof structures all sit where you would never think to look.

Early Warning Signs: How Bali Hut Termites Show Up in Outdoor Timber Structures

Homeowner's hand in the foreground tapping a wooden post

Design aside, most owners notice trouble months after the colony has already moved in. Passing your hut every day for five years means you stop noticing it. The surface still looks like solid timber, but the core has quietly turned to paper.

Here is the thing. State Forestry independent data shows that one in every five Australian homes will be attacked by termites at some point in its life. Outdoor timber structures are even more exposed than most homes, sitting much closer to the soil.

Five signs give the game away early, and none of them needs a ladder.

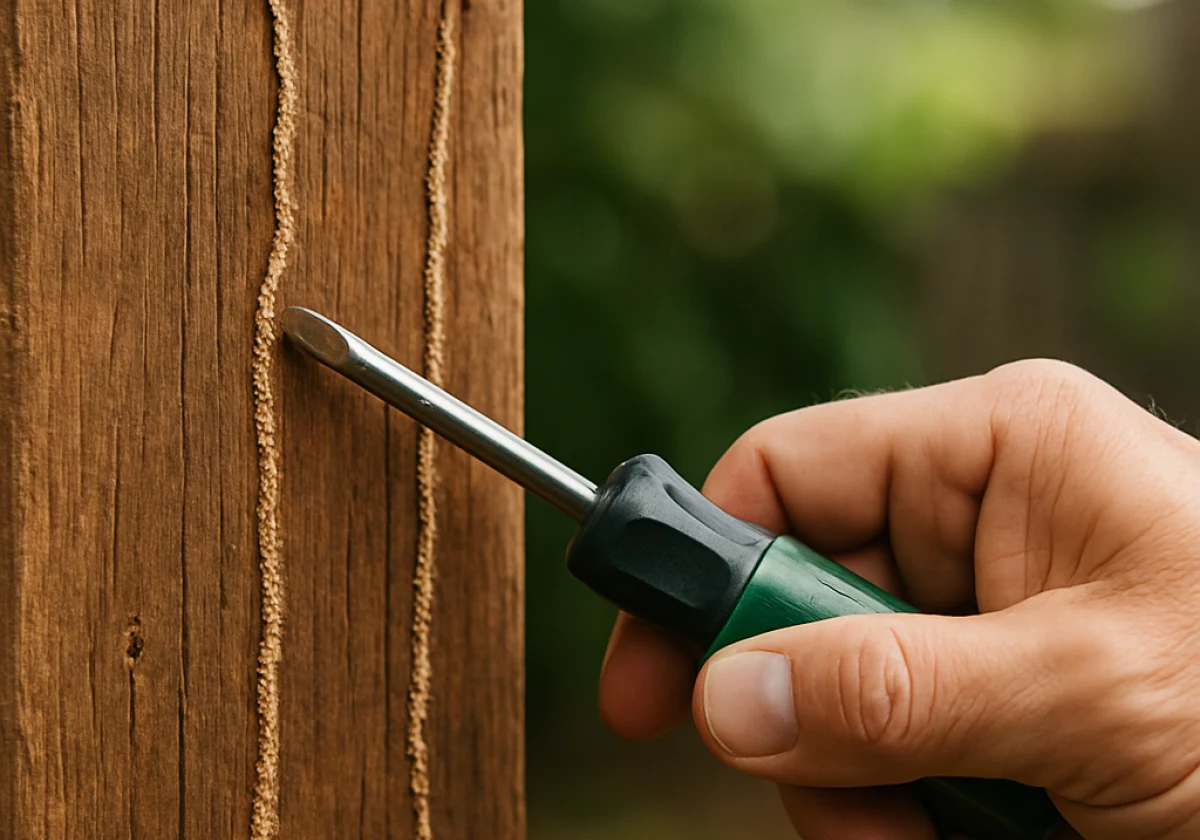
  1. Mud Tubes on Posts: Pencil-thin lines of mud up a post show workers commuting between the underground nest and your timber.
  2. Hollow-Sounding Timber: Tap each post with a screwdriver handle and listen for a drum note instead of a solid thud.
  3. Sagging Roofline or Thatch: When the ridge dips or one side slumps, a frame member has lost its strength.
  4. Discarded Wings and Frass: Tiny wings on the slab after warm, humid weather point to a nest close to the house.
  5. Soft Spots Near Water: Where water pools or drips, the timber stays soft, and a thumb press sinks into the surface.

Two signs together usually mean an active colony rather than old damage left by a previous owner. In that case, book a pest inspection that week rather than waiting for the next storm.

Choosing the Right Timber Termite Protection for Your Bali Hut

Pest controller crouching beside a wooden Bali hut post

Good timber termite protection adds years to a hut for less than one repair bill. Your best option depends on whether you are building now or defending a hut already in the ground.

OptionBest ForTypical CostLongevity
Physical barriers (stirrups, ant caps, mesh)New builds and post replacements$300 to $80020 years plus
Chemical soil treatmentExisting huts with ground contact$600 to $1,5005 to 8 years
DIY kitsSmall gazebos and low-risk sites$80 to $2501 to 2 years
Professional termite management systemHigh-risk blocks and large structures$2,000 to $4,0008 years with annual checks

Call a licensed pest controller the moment you spot live activity, as a DIY kit cannot reach a nest sitting metres away beneath the lawn. By contrast, the chemical treatments that termite technicians apply around your footings will typically last five to eight years.

Before work begins, ask what the termite treatment covers and whether your build includes a structural warranty. Australian Standards already specify termite management requirements for new homes, and meeting that same standard for your hut adds very little to the build cost.

A DIY Bali hut kit can still be properly protected. The key requirement is that the posts rest on stirrups and never contact the soil directly.

Regular Bali Hut Maintenance Keeps White Ants Away for Good

Simple Bali hut maintenance habits keep termites from coming back season after season. Regular inspections termite specialists run each year cost around $300 and catch activity while it’s still confined to one post or bearer.

It’s the same inspection pest controllers run on a house, only quicker. Book yours in the same month each year so the job never slips off the list.

Between visits, keep soil, mulch and garden beds at least 75 mm clear of every post so the base stays visible. Leaks deserve the same urgency, since a dripping spa fitting or a blocked downpipe keeps timber wet long enough for a colony to settle in. Fix them the week you notice (a $12 washer beats a new post).

After a big blow, check the thatch for lifted sections and thin patches. Plenty of owners leave this until the first drip appears inside, and by then the frame has taken weeks of water.

Huts we installed years ago still have sound posts, and the owners who kept mulch clear of the base are the reason why. Buyers read a sagging roof as a bill waiting for them, so a well-kept hut protects property value too.

Bottom line: An outdoor living space is only worth what the frame under it is worth.

Give Your Bali Hut the Care It Deserves

Bali hut termites never announce themselves, and the ground contact under your posts does the damage quietly over several seasons. Two or three checks each year keep a small problem from becoming a full rebuild.

Walk out this weekend, look hard at the base of every post, and note anything soft, muddy or damp. Then get a qualified set of eyes on whatever worries you (five minutes now beats a rebuild quote later).

Georgia Wiseman builds, re-thatches and maintains Bali huts, gazebos and outdoor timber structures for homes right across Australia. Contact us to book an inspection and enjoy real peace of mind.

Read More

Bali Hut Near a BBQ? Planning Around Smoke, Heat and Cooking Areas

Bali hut BBQ area

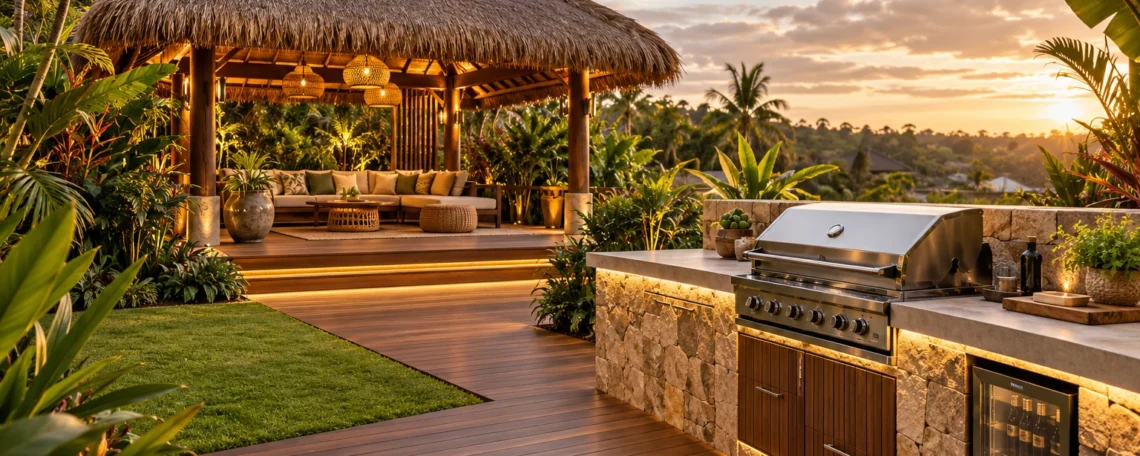
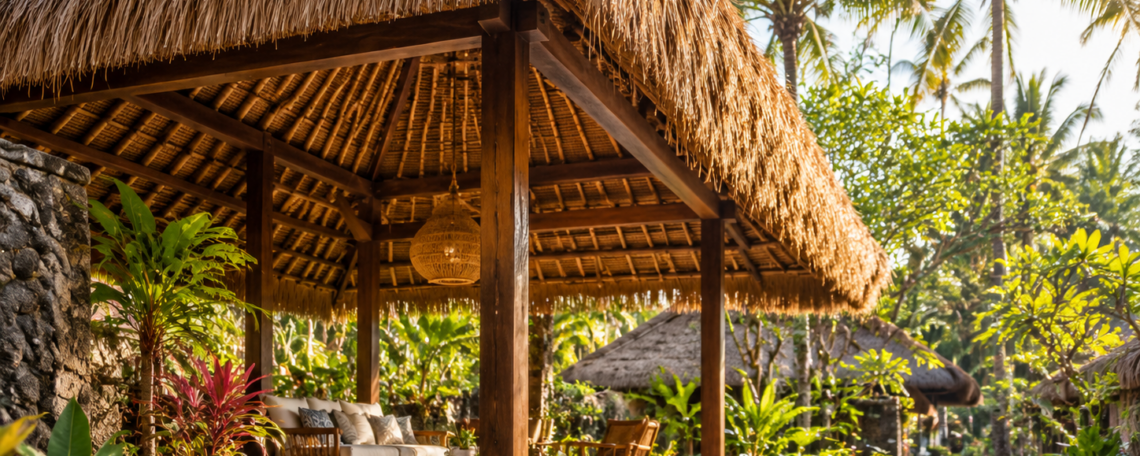
A Bali hut gives your backyard the feel of a tropical outdoor retreat, especially when you pair it with a BBQ. But placing the barbecue too close to the hut can leave you dealing with smoke, radiant heat, and cooking grease where you don’t want them.

So, how do you get the relaxed outdoor-kitchen setup without creating a problem for the hut, the roof, or anyone sitting underneath it? You plan the cooking area around the structure before the first post goes in.

And if you don’t know how, we’ll show you. You’ll learn how to position the BBQ, choose suitable roofing, and plan the space around your Bali hut.

How Far Should a Bali Hut Sit from Your BBQ or Cooking Area?

How Far Should a Bali Hut Sit from Your BBQ or Cooking Area?

Start with enough space between the BBQ and the hut, then consider the type of grill you’re using and where its heat and smoke will travel. Let’s break each one down in detail.

Minimum Clearance Between a Bali Hut and Your BBQ

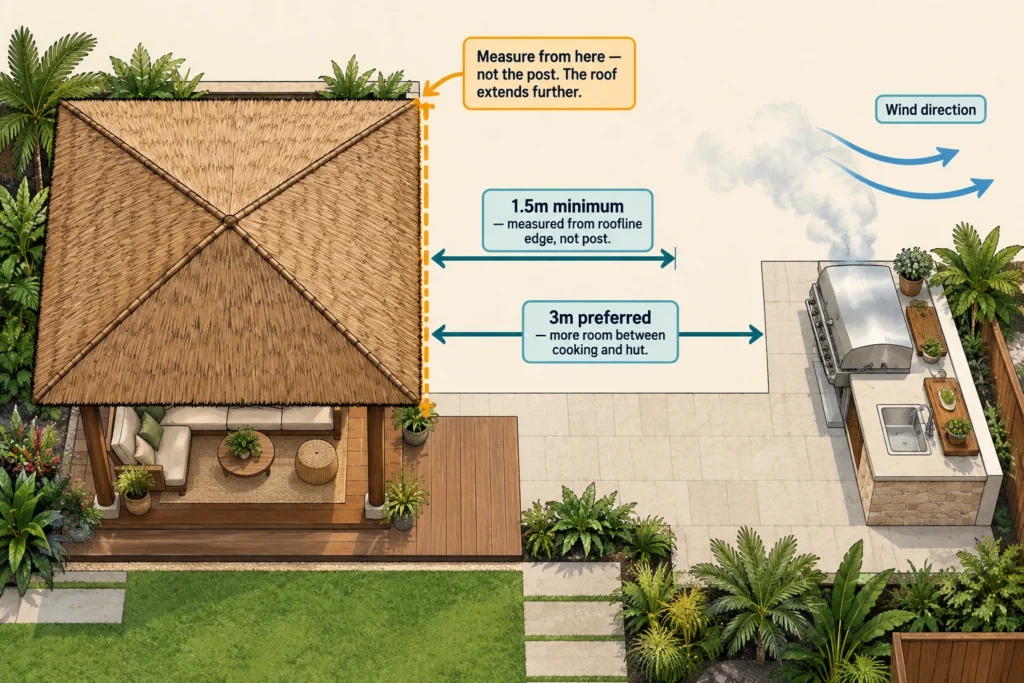
Keep at least 1.5 metres between a built-in barbecue and the nearest post. If you have the space, around three metres gives you more room between the cooking area and the hut.

When measuring the distance, use the edge of the hut’s roof, rather than the supporting post, as your reference point. The roof usually extends beyond the posts, so measuring from the post alone can make the BBQ seem farther away than it actually is.

Also consider what sits above and around the BBQ. A cooking area directly beneath or beside a thatched roof can expose it to heat, smoke, and grease over time.

Gas, Charcoal and Wood-Fired BBQs Need Different Considerations

The type of BBQ affects how you use the space around it. Gas BBQs generally produce less smoke and don’t create loose embers, while charcoal and wood-fired grills can produce sparks, ash, and heavier smoke.

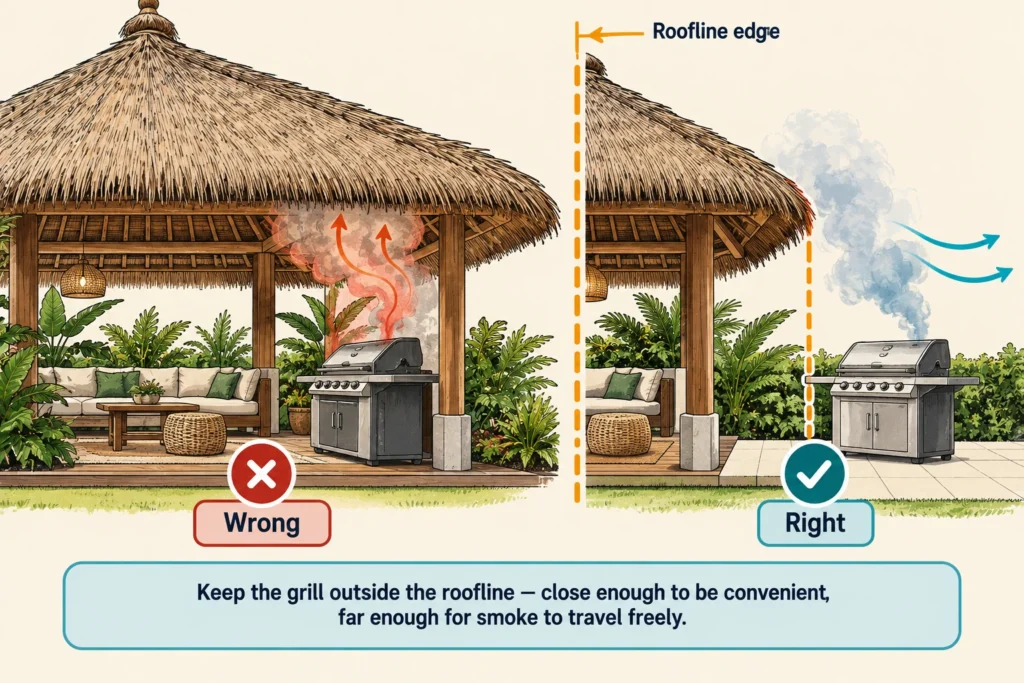
If you’re using a charcoal or wood-fired BBQ, allow more space between the grill and the hut. Keep the grill outside the roofline so sparks and smoke have less chance of reaching the thatched roof. This also gives you more room to manage the grill safely.

Place the BBQ Where Smoke Blows Away from the Hut

Wind direction affects where smoke travels around your yard. Even with enough space between the BBQ and hut, smoke can drift towards the thatched roof or seating area.

So before choosing the final position, watch how the breeze moves through your yard. Where possible, place the BBQ so the usual wind carries smoke away from the hut and other areas where people sit.

And if you can, check the position at different times of day because wind direction changes. This way, you can avoid a setup where smoke regularly blows into the hut while you’re cooking.

Keep the BBQ Outside the Bali Hut’s Roofline

Keep the BBQ Outside the Bali Hut's Roofline

The roof changes what happens to heat and smoke around your BBQ. Put the grill too close, and you could end up with smoke hanging around under the hut instead of drifting away.

So, keep the grill outside the roofline rather than tucking it underneath the thatch. It can still sit close to the hut, keeping the BBQ within easy reach when you’re cooking and everyone else is relaxing.

Building the Bali hut from scratch? Decide where the BBQ will go before you settle on the hut’s size and position. That way, you can give the cooking area enough room without squeezing everything in later.

Check Your Local Council Rules Before You Build

You’ve worked out where the BBQ should sit and how much space to leave around it. Before you start digging holes, there’s one more thing to check: whether your planned setup needs council approval.

The rules can depend on the size and height of the hut, where it sits on your block, and whether you’re adding a fixed cooking area. They also vary between states and councils, so don’t assume a setup that works next door will work on your property.

Small huts may qualify for an exemption, but that doesn’t mean every Bali hut and BBQ setup does. Use the figures below as a starting point, then check the current requirements with your local council before ordering materials.

RegionCommon exemption limitUsual boundary setback
Queensland (Gold Coast, Sunshine Coast)Up to 10 sqm, under 2.4 m high900 mm from fences
New South WalesUp to 25 sqm on lots over 300 sqm900 mm from boundaries
VictoriaUp to 10 sqm, under 3 m high1 m from boundaries
South AustraliaUp to 15 sqm, under 2.5 m high900 mm, varies by zone

Bushfire zones and heritage overlays can add extra requirements, too. So if your property falls into one of these areas, check the exempt development rules on the NSW Planning Portal or your own state equivalent.

Leave Enough Room Around the BBQ

Leave Enough Room Around the BBQ

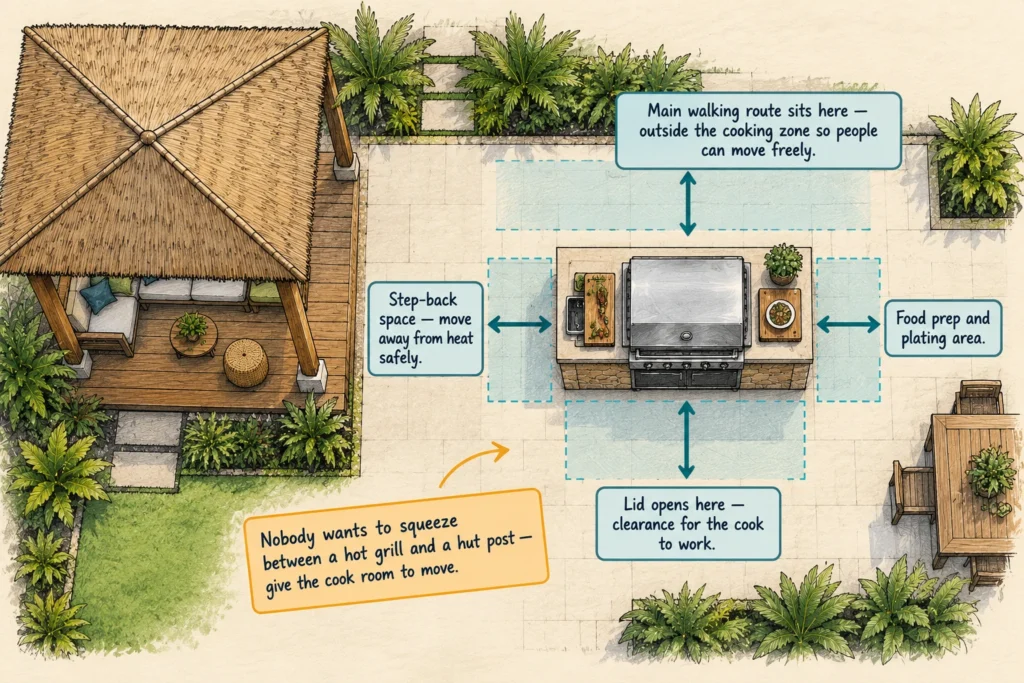
Once you’ve worked out the BBQ’s position, think about what needs to happen around it. The cook needs room to move, guests need somewhere to sit, and nobody wants to squeeze between a hot grill and a Bali hut post.

To avoid that, keep enough space around the BBQ to open the lid, move food, and step away from the heat.

It’s also worth keeping the main walking route outside the cooking zone. That way, people can move between the hut, house, and garden without crossing directly in front of the grill.

And if you’re adding screens or planting around the area, don’t use them to trap the smoke. Give smoke somewhere to move rather than surrounding the BBQ with dense barriers.

The goal isn’t to build a huge outdoor kitchen. You just need enough room for the BBQ to work comfortably while the Bali hut remains an easy place to sit, eat, and relax.

Bringing Your Bali Hut BBQ Area Together

Now you know what to consider when placing a BBQ near your Bali hut. Give the cooking area enough space, keep the grill outside the roofline, and think about where the smoke will travel.

Get those details right before you build, and you can spend your afternoons cooking and relaxing without constantly worrying about heat, smoke, or where the BBQ should sit.

If you’re planning a new Bali hut for your backyard, Georgia Wiseman can help you choose the right setup for your space. Reach out to the team to discuss your plans and find a Bali hut that suits your outdoor area.

Read More

The First Storm After Installation: What Should You Check on a New Bali Hut?

Bali hut roof

After the first storm following installation, check your new Bali hut’s thatch, frame, tie-downs and drainage for damage. That first heavy blow tells you more about how the build handles weather than a calm month ever could.

Most Australian backyards cop at least one strong squall soon after a build goes up, and fresh thatch settles during that weather. Georgia Wiseman sees the same pattern every season, so a slow walk-around within a day or two saves money later.

Honestly, the timing is rarely luck. Bureau of Meteorology records show an average of about 11 tropical cyclones forming in the Australian region each season, with roughly four of them crossing the coast.

This guide covers the checks that count, from ridge cap to ground drainage, plus a routine you can keep. Grab a ladder and start at the top.

Post-Storm Bali Hut Roof Inspection: What to Check First

A single missed tear in the thatch can let water pool inside the frame for weeks. Storm damage on a Bali hut roof rarely announces itself, so you’re hunting for small changes rather than obvious holes.

Post-Storm Bali Hut Roof Inspection: What to Check First

Work across the roof in three passes, starting with the broad surface and finishing with the bundles themselves.

Checking the Thatch and Roof Surface for Gaps and Thin Spots

Stand underneath first and look up towards the light, because daylight coming through the thatch marks every thin spot far better than any view from above.

From there, move outside and scan the roof surface for patches that look flattened or combed the wrong way (wind lifts the layers and drops them back wrong).

Press a gloved hand into any suspect patch. Sound thatch feels springy and dense, while a thinned section gives way under light pressure.

Spotting Damaged Thatch Near the Ridge Cap

The ridge cap sits at the highest point and takes the worst of the wind, which makes it the first place damaged thatch turns up after a storm.

Look for capping lifting at either end, plus any gap between the cap and the thatch running down each side. In our experience fitting huts across Australia, ridge failures start as a two-finger gap and widen quickly.

Here is the thing. That seam sits directly over the ridge beam, so water entering there runs straight into the frame instead of shedding off the roof.

Are Any Thatching Bundles Loose or Missing?

Yes, storms do pull bundles loose, and you’ll spot them as dark gaps or as tufts hanging below the clean line of the roof.

Tug gently on a few bundles along the lower edge, where the binding wire carries the most load during strong gusts. Missing bundles leave the row above them exposed, so the damage spreads with every shower that follows.

Mark each loose one with a peg or tape so your repair crew works from a list rather than guessing (tape beats memory every single time).

Frame and Tie-Down Checks for Bali Huts Across Australia

With the thatch sorted from the ground up, solid tie-downs keep the whole structure steady through the next big blow. Every Bali hut Australia-wide pushes that wind load down through the frame sitting under its thatched roof. Gazebos, Bali huts and pergolas all shift in the same way.

Frame and Tie-Down Checks for Bali Huts Across Australia

Run through these four points before you pack the ladder away.

  • Post Bases and Bolts: Rust streaks or a bolt that turns freely by hand point to movement during the storm, so tighten each one and recheck it a week later.
  • Cyclone Strapping: Check every galvanised strap where it wraps the rafter, because a bent or stretched strap has already taken a hit you cannot see from the lawn.
  • Fresh Rafter Splits: Splintering in the timber around screw holes tells you the joint flexed further than the fixing was ever meant to allow.
  • Ground Anchors: If your hut sits on soft lawn, soil around the footing washes out and leaves the post standing in a shallow pocket.

Tighten what you can reach with the right tools, and photograph anything you cannot. Those photos give an installer real information before anyone quotes a repair.

Why Does Water Pooling Signal a Drainage Problem for Your Thatched Roof?

Water pooling around a Bali hut signals a drainage problem because rain cannot drain away fast enough. Thatch sheds a surprising volume in a short burst, and all of it lands in a ring around the posts.

Ground takes the hit before anything else does. Clay soils across much of Australia hold that water for days, and flat Brisbane blocks drain slower again, which softens the base of every post sitting in them.

Conditions shift with the postcode, too. Humid stretches on the Central Coast keep the lowest thatch damp for weeks, while in South Australia, Adelaide sheds water fast and then bakes the timber dry. Thatched builds in New Zealand sit somewhere between the two.

Beyond the posts, standing water keeps the lowest row of thatch damp long after the sky clears. Damp thatch at ground level rots from the bottom up, and that row holds the rest of the roof edge in place (the cheapest row to save, too).

Every Bali hut inspection we run after a wet week starts with a bucket tipped at the base of a post. Bottom line: if the water sits still for a minute, you want a fall of 50 mm over the first metre, or a shallow gravel trench leading away.

Building a Simple Thatched Roof Maintenance Routine for Australian Huts

Once the roof and frame are checked, a simple routine keeps them that way. Regular thatched roof maintenance takes a few hours a year and keeps the thatch going well past a decade.

Building a Simple Thatched Roof Maintenance Routine for Australian Huts

This schedule suits most Australian homes.

WhenWhat to doWhy it helps
After each stormWalk the roofline, check ridge and postsCatches small tears early
Twice a yearClear leaves and debris from the thatchStops damp patches forming
YearlyRetighten bolts, straps and anchorsKeeps the frame rigid
Every 8 to 12 yearsBook a full re-thatchGives you a new roof of fresh thatch

Worth noting: huts under gum trees need clearing twice as often. Keep a photo from each check so you can track how the thatch ages.

Keep Your New Bali Hut Ready for the Next Australian Storm

A first storm exposes weak points while they’re still small and cheap to fix. Twenty minutes with a ladder and a torch protects a structure built to last years.

Put the next check in your calendar before you climb down, because the habit does more good than any single Bali hut inspection. Photograph anything you’re unsure about and send it through for a second opinion.

Georgia Wiseman offers re-thatching and repair services for gazebos, Bali huts and pergolas across Australian backyards. Contact us for a post-storm check of your roof.

Read More

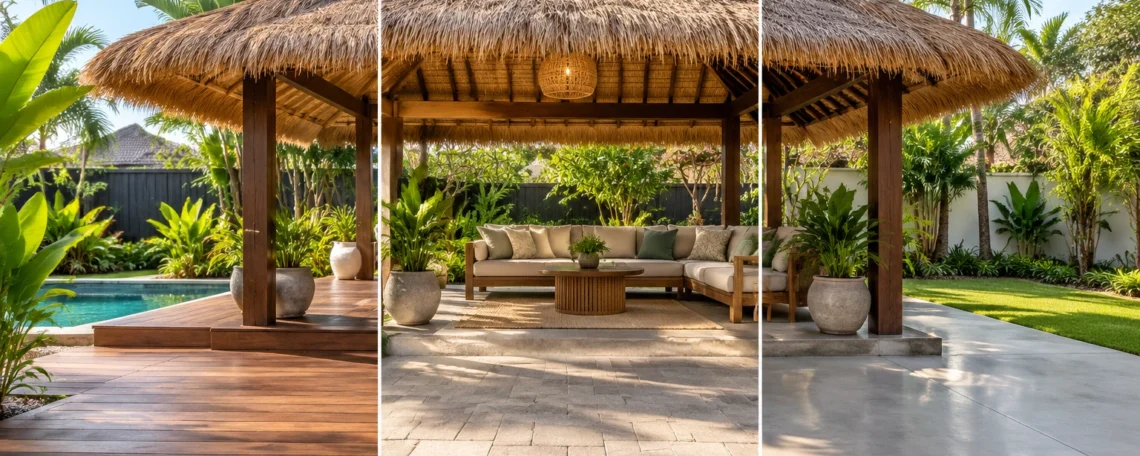
What Should Sit Under a Bali Hut: Decking, Pavers or Concrete?

Your Bali Hut Flooring Choice

Decking, pavers, or concrete: the base you choose determines how your Bali hut flooring drains, supports furniture, and weathers over time. Get this choice wrong, and you’ll spend more time fixing your base than relaxing in the shade on a hot day.

We’ve helped plenty of homeowners work through this exact decision. More often than not, the yard does most of the work, since clay soil, steep slopes, and poor drainage each push you toward a different base before budget or style even enters the picture.

To give you a clearer picture, this article covers what each base involves and which yard conditions suit it best. After that, we’ll show you how your own block points toward the right pick.

Let’s get into it.

Timber Decking: The Elevated Option for Airflow and Style

Oiled timber decking enhances your Bali Hut look

Many homeowners pick decking first, drawn to its warm, natural finish. A stained or oiled surface enhances the look further and brings real benefits in terms of weather protection too.

Beyond the look, raised decking lifts your Bali hut off the soil so air moves freely underneath and moisture stays away from the timber beneath. It works much like a verandah floor that way.

And that’s just the start. It earns its spot as a base choice for a few other reasons too.

  • Moisture Stays Out: As we mentioned, raising your Bali hut off the earth stops moisture from collecting against the structure. We’ve seen posts rot within two years when a base sits too low.
  • Gaps Handle Rain: A small gap between each board, usually 4mm to 6mm, gives rainwater somewhere to go instead of pooling on top. Without that spacing, water has nowhere to go and starts pooling around your posts instead.
  • Easy Annual Upkeep: Once installed, a quick coat of decking oil once a year keeps the timber protected. Most households get 15 years or more out of a well-maintained deck.

For backyards that get regular rainfall, that drainage advantage makes decking the lowest-risk base choice for your own Bali hut over a 10 to 15-year period.

Bali Hut Pavers: A Popular Middle-Ground Option

Unlike decking, pavers are flat stone or concrete tiles laid directly on the soil, with no raised framing or annual resealing required. So if you’re after a neat, flush outdoor space where family and friends can relax without the ongoing work, this option is a fantastic choice to consider.

Low maintenance is only part of it, though. Pavers lay completely flat underfoot, which means heavier pieces like stone tables and fire pits don’t rock or need re-levelling. Pavers handle both stability and drainage without sacrificing one for the other.

The drainage side is just as practical. Small joints between each paver pull rainwater down through the base rather than letting it collect near your posts. A dry base means less moisture pressing against your Bali hut’s frame, which reduces rot risk over time.

Beyond drainage and stability, style flexibility is another advantage worth noting. Pavers come in a range of materials, including natural stone, concrete-look tiles, and terracotta finishes. That variety means you can create a style that adds charm to your existing backyard without redesigning anything around it.

In our experience, pavers suit the widest range of backyards simply because the soil preparation is minimal and the overall cost is more affordable than concrete. Pavers suit the widest range of backyards simply because the soil preparation is minimal and the overall cost sits well below a concrete pour.

Can You Pour a Concrete Base for a Bali Hut?

Heavy-duty base, concrete gives your Bali hut a solid, level surface

Yes, and for backyards that need a permanent, heavy-duty base, concrete is in a different league entirely. It locks into the soil and gives your Bali hut a solid, level surface without shifting or settling. A good contractor with great service makes sure it stays that way.

The main catch is the installation process. Concrete needs proper base preparation before pouring, since soil movement beneath a slab can cause cracking if the groundwork is rushed.

That complexity aside, the slab has a few clear strengths that make it worth considering.

  • Built for Weight: Concrete supports more weight than decking or pavers. While pavers handle standard outdoor furniture and smaller fire pits, a large built-in barbecue, spa surround, or full stone lounge setting needs the load capacity only a slab provides.
  • Almost Zero Maintenance: Once a professional seals the slab after pouring, concrete needs little more than an occasional hose down. Unlike timber, there’s no recoating, resealing, or annual maintenance schedule to follow.
  • Not a DIY: The area beneath needs proper preparation and levelling before you pour a slab. Skip that step, and you won’t be able to anchor the structure properly, which leads to cracking within the first few years.

Concrete delivers the most durability of the three options, but it asks the most of you upfront. If you’re planning a permanent outdoor space around your Bali hut, that trade-off is usually worth it.

Let Your Soil and Slope Decide the Base

Testing the soil and slope before deciding on the base

Your soil type determines how water drains after rain, and your slope determines where that water travels next. Together, they narrow three options down to one before you spend a cent on materials.

In practice, most Australian backyards fall into one of three categories.

  • Clay Soil Risk: Clay holds water for hours after rain and shifts slightly as it dries, which makes concrete a risky choice. Meanwhile, pavers or decking handle the drainage demand without the cracking risk.
  • Slope Limits Options: Unlike flat ground, a significant slope rules out pavers without serious regrading first. Decking handles slope better since the frame can be adjusted to level during installation.
  • All Options Open: Where clay and slope narrow the field, flat ground with sandy soil gives all three bases a fair chance. Your decision then comes down to budget, style, and how much upkeep you’re willing to commit to.

If your soil type isn’t obvious from the surface, a quick test kit from your local hardware store costs under $20. That result alone tells you where your yard stands before you commit to any stylish outdoor structures.

Installing Your Bali Hut Base: What to Expect

Expect soil and ground preparation, levelling, and framing for all three bases, but the time and effort each installation involves varies significantly. Concrete falls at the far end of that range, and in our experience, it needs the most patience to get right.

Before you book anyone in, this breakdown shows what each base demands.

Base

Process

Timeframe

DIY Friendly?

Decking

Posts, levelling, boards

1–2 days

Yes

Pavers

Compacted base, laying, levelling

1 day

Yes

Concrete

Professional pour, curing

3–7 days

No

What the table doesn’t capture is the hidden cost of getting it wrong. A rushed concrete pour can mean cracking within two years, while a poorly compacted paver base leads to uneven surfaces that are expensive to relay.

Decking is the most forgiving of the three since individual boards can be detached and replaced without rebuilding the whole frame. Over time, boards show wear. But most DIY installs need only basic tools, including nails and a level, to complete the job.

One Last Thing Before You Pick a Base for Your Outdoor Space

Most Bali hut owners think about the thatched roofing, the structure, and the style. The base rarely gets the same attention, and that’s where things go wrong. A poor base choice reveals itself in drainage issues, unstable furniture, and repair bills that could have been avoided entirely.

In this guide, we walked you through each base option, what installation involves, and how your soil and slope narrow the choice. You should now have a clear starting point before anything gets ordered or booked.

Our team at Georgia Wiseman has helped hundreds of Australian homeowners land on the right base for their yard, budget, and lifestyle. Contact us today, and we’ll walk you through local council regulations, your property’s council approval, and more.

Let’s get your beautiful Bali hut built properly, and enjoy the beauty of a well-chosen base for years to come.

Read More

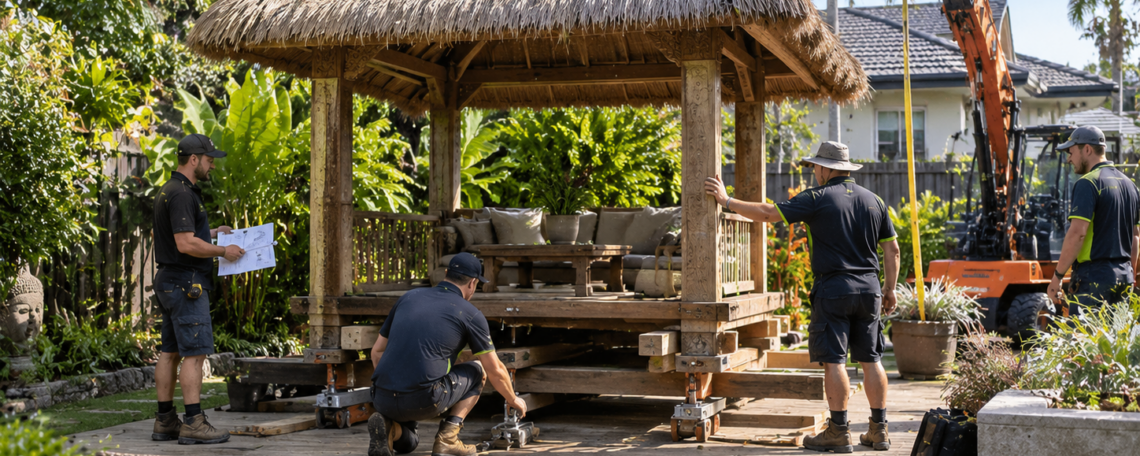
Can You Move a Bali Hut? What to Check Before Relocating an Existing Structure

Can You Move a Bali Hut

You can move a Bali hut if the frame and thatch roof are still strong enough to be taken apart and rebuilt. Their condition will affect the work involved and the total cost.

However, most owners only consider moving a Bali hut after a renovation, pool project, or house sale makes the decision necessary. By then, the hut may have spent years exposed to Australian weather, which can affect whether it’s suitable for relocation.

The truth is, relocation is nothing but a second Bali hut installation, just with used parts. So in this guide, we’ll cover the checks worth doing first, the real cost of each path, and the point where a new build wins.

What Should You Check Before You Move a Bali Hut?

Before you move a Bali hut in Australia, check the frame, thatch roof, pole spacing, and your council rules. Any one of these can stop the move, so check them all before you start.

What Should You Check Before You Move a Bali Hut?

While you’re at it, run these checks before you book a truck or pull a pin from the roof:

  • Frame and Pole Condition: Check the posts for cracks, rot, or termite damage before planning the move. Damaged posts may not hold up during a second build. So tap each pole and inspect the base where it meets the ground. Also, measure the distance between the poles because the new footings need to match the existing layout.
  • Thatch Roof Wear: Natural thatch older than eight to ten years often needs replacing. These older, dry reeds can break apart when you remove them from the battens, which makes them unsuitable for reuse.
  • Council Permits: Many councils treat a moved hut as a new structure and ask for fresh approval, especially near boundaries, pools, or an easement.
  • New Site Preparation: Level the new ground before installing the hut. Then check that water can drain away and that there’s enough space around the poles and wide eaves. You might also want to consider how much wind the site gets, as an exposed area puts more pressure on the hut than a sheltered space.

Now, permits aren’t always required, but the rules depend on the hut’s size, location, and the type of development approval that applies.

In NSW, the State Environmental Planning Policy (Exempt and Complying Development Codes) 2008 sets the rules for exempt development. It allows some gazebos up to 20 square metres in rural and large lot residential zones to qualify. The limit is 15 square metres in most other zones, provided the structure meets the other requirements.

Larger structures may need approval, and each state has its own rules.

Frame and Pole Condition Decide Whether a Bali Hut Relocation Will Work

Relocating a Bali hut frame without checking its condition can lead to extra repair costs. Timber and thatch also age differently, so each material needs a separate inspection.

That’s why when you search “Bali hut Australia”, you’ll find plenty of builders who’ll sell you a new one. Far fewer will move an old one (and that tells you something).

So work through the three checks below before you lock in a date with anyone.

Testing the Poles and Joints for Rot or Cracking

Start at the base of each pole, where ground moisture can cause the most damage. Push a screwdriver about 20 mm into the timber above the footing. If the blade sinks in with light pressure, the timber has become soft and may not survive removal.

This kind of damage can be difficult to see because the outside of the pole may still look solid. We’ve stripped down huts where three of six poles crumbled at the base (not that you could tell from the back deck).

The rest of the frame needs the same attention. Check the top joints for rusted bolts and brackets, as these connections can weaken before the timber itself shows major damage.

Are DIY Kit Bali Huts Easier to Relocate?

Yes. DIY Bali hut kits are usually easier to take apart because they’re designed to bolt together during installation. Many kits even have numbered poles and pre-drilled beams. This makes each part easier to identify when it’s time to rebuild the hut.

Are DIY Kit Bali Huts Easier to Relocate?

That design also makes the process similar across different kit sizes. For instance, you can dismantle a 3m, 4m, or 5m Bali hut using the same basic method. Plenty of people manage it over a long weekend with two mates and a ladder (ask anyone who has tried it in February). Custom-made frames rarely give you that.

Remember that the fixings still need a careful check before you start. Bolts can rust or seize over time, especially if a DIY Bali hut has been left unsealed. And if the bolts are damaged, removing them can take longer, and some may need replacing before the frame goes back up.

Thatching Damage Often Means the Thatched Roof Cannot Be Reused

Thatch can be difficult to move without damaging it. As reed gets older, it dries out and becomes less flexible.

Alang alang (the grass used for thatching) can have the same problem, while synthetic thatch usually handles removal and transport better. This makes the roof’s age and material important when you’re deciding if it can be reused.

Now, there’s a good reason to spend on the roof rather than skip it. A thick thatched roof provides insulation and can keep the shaded area cooler than the surrounding lawn on a hot afternoon. If the existing thatch can’t survive the move, replacing it can help restore that comfort.

Supplier catalogues do not help either. You may see terms such as African thatch, Cape reed, Bali thatch, and DIY Bali thatch. Here, you need to compare the material, quality, and roof size instead of relying on the product name. Budget for a fresh roof on any hut older than eight years and treat a reusable one as a bonus.

The frame can create similar confusion when you’re looking for replacement parts. One catalogue might list a Balinese Gazebo, the next files Balinese gazebos under gazebos bali, and a third sells an African gazebo beside its African huts.

Ignore the spelling (even on the site that labels its page “Balinese gazebos”) and check whether the African hut in the photo is the same frame you already own.

Relocation Costs for Bali Huts: Comparing DIY Removal, Professional Help, and a New Build

Once you’ve checked the hut’s condition, the next question is cost. Compare your options early, because relocating an old hut can cost more than buying a new one. The final price depends on labour, machinery hire, and whether the existing thatch needs replacing.

The table below sets the three realistic paths side by side.

OptionTypical CostTime NeededRisk of Damage
DIY removalLowest, tools and a trailer hire1 to 2 weekendsHigh if the frame or thatch is brittle
Professional relocationMid-range, crew labour and machinery2 to 4 daysLow, handled by a trained crew
Buying newHighest, full new structure1 to 2 weeks lead timeNone, fresh materials throughout

Truth is, any backyard structure relocation follows the same maths. A new build hands you a fresh living space with no hidden rot in it, and that certainty is part of what you are paying for.

Our rule of thumb: once a quote passes roughly 70% of a new build, the new hut wins. A tight budget with a solid frame still favours doing the removal yourself.

Choosing a Professional Installer for a Safe Bali Hut Move

Once you know the costs, the next step is finding an installer with the right experience. Ask how many Bali huts they’ve relocated, rather than how many they’ve built. A new installation and a relocation require different skills, especially when older poles and other materials may be weaker.

Choosing a Professional Installer for a Safe Bali Hut Move

That experience is important during both parts of the job. So look for one team that can dismantle the hut, transport it, and rebuild it on the new pad. Having one crew handle the full job will give you one point of contact if something gets damaged. They may also be able to install features such as thatch gazebos, bamboo panels, screens, and water features while they’re working on the yard.

More importantly, before booking the crew, check that they have suitable insurance. Ask to see a certificate of currency rather than accepting a verbal promise. A hut coming down beside a pool fence or a neighbour’s roof is a genuine risk (one dropped beam costs more than the whole move). That’s why you should ask to see the installer’s insurance certificate before booking the job.

Honestly, the quote itself tells you most of what you need. It should separate the costs for dismantling, transport, new footings, and any replacement thatch. A single lump sum with no breakdown is the clearest red flag in this trade.

Get Expert Help to Relocate Your Bali Hut

A relocated hut can carry your outdoor living area to a new address, but only when the frame and the roof both pass inspection. Every other decision in the job follows that one result. Bali huts (or Balinese huts) are no harder to move than any other timber structure once you know what you are working with.

So book the inspection before you book the truck. A week of checking can save you a fortnight of rebuilding.

Georgia Wiseman builds, relocates, and re-thatches Bali huts for homeowners right across Australia. Contact us to arrange a free quote and get a straight answer on whether your hut is worth moving.

Read More

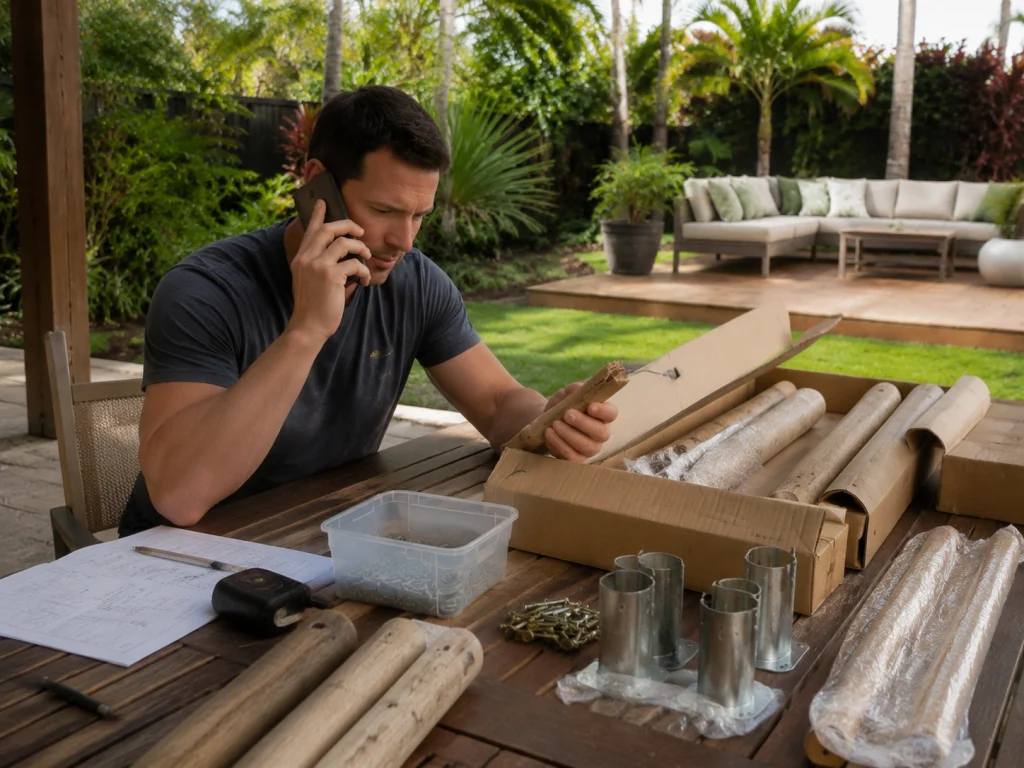
DIY Bali Hut Kit: What Should Be Ready Before the Parts Arrive?

DIY Bali Hut Kit: What Should Be Ready Before the Parts Arrive?

For a DIY Bali hut kit, getting the site, tools, and delivery area ready before the parts arrive makes the whole build much smoother. A lot of the work happens before a single part gets unboxed. A little planning upfront saves a lot of headaches on build day, and it keeps the whole project on track from the start.

Most people put all their energy into picking the right Bali gazebo and almost none into getting ready for it. The kit arrives and suddenly the build stalls because the ground isn’t level or the tools aren’t there. That’s a frustrating way to start a backyard dream.

The article covers exactly what needs to be sorted before your Bali hut parts show up. We’ll also cover site preparation, tools and permits, and what to check when the kit lands at your door.

Your Site Needs to Be Ready Before the Kit Does

A Bali hut isn’t just a structure you drop into any spare corner of your property. The outdoor space underneath it needs to be stable, clear, and ready before a single part is installed.

With that in mind, rushing this step early means delays, extra costs, and a build that doesn’t sit right. Here’s what to sort on your property before anything else:

Is Your Ground Level Enough for a Bali Hut?

We’ve seen builds stall on day one simply because the ground wasn’t checked beforehand. Uneven ground causes structural problems during Bali hut installation, so levelling the site beforehand saves real headaches.

In this case, a spirit level and some basic earthworks can confirm whether your outdoor space is flat enough for a stable build. If the grass area slopes even slightly, the posts won’t sit securely, and the whole frame will be off.

For most backyards, the choice sits between laying a concrete slab or digging individual holes for each post. Either way, your soil type and drainage will usually tell you which one makes more sense (your local landscaper will usually point you in the right direction).

Clearing the Outdoor Space: What Needs to Go

Clearing the Outdoor Space: What Needs to Go

Before the Bali hut frame goes up, the outdoor space needs to be clear and ready. Remove any overhanging branches, garden beds, or existing structures that sit within the hut’s footprint.

Once that’s sorted, check that the cleared backyard area gives you enough room beyond the kit dimensions. You’ll need space to move around safely during the build, not just space for the structure itself.

And yes, there’s one more check that’s easy to miss until you hit a pipe. Mark any underground irrigation lines or cables before digging, especially near an existing deck or shade structure.

The Tools and Supplies Your DIY Gazebo Kit Won’t Include

Most people assume the kit comes with everything they need, and that’s exactly where the delays start. A DIY Bali hut kit supplies the structural parts, but the tools and extra materials are on you to source.

Get these details sorted before the delivery arrives:

Basic Tools Every Bali Hut Project Needs

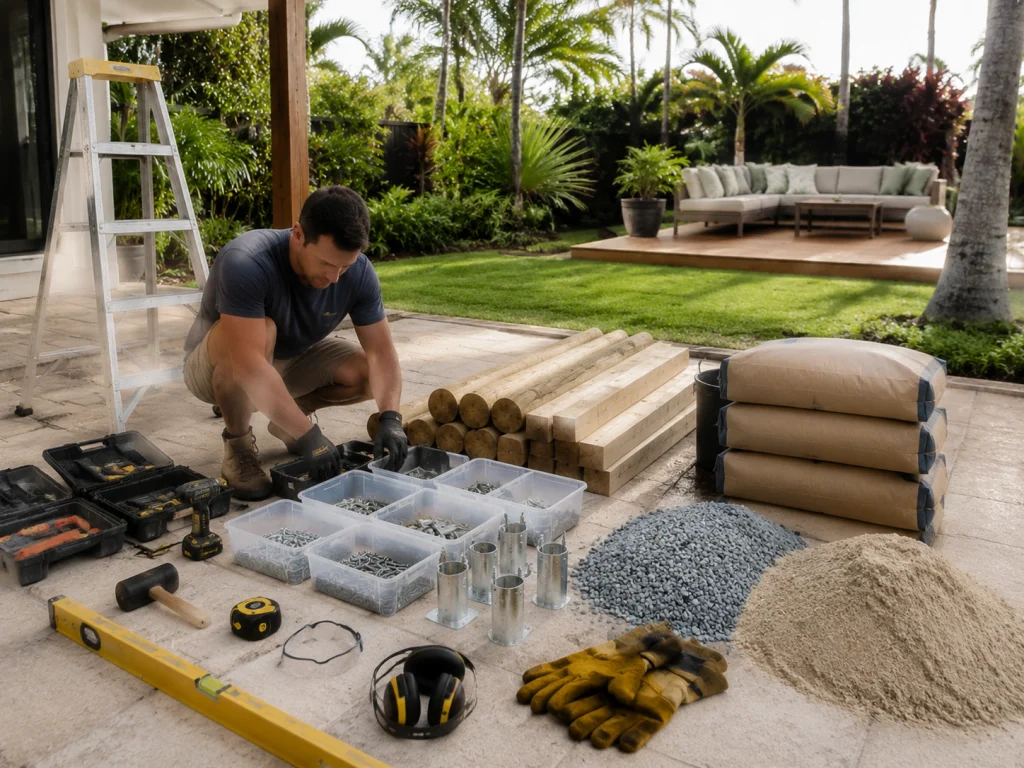
A cordless drill, rubber mallet, tape measure, and spirit level are the minimum tools required for assembly. You won’t get far past opening the boxes without these in your hand.

Beyond the tools, don’t try to wrangle a roof beam by yourself. Having a second pair of hands on the day makes lifting heavy timber and aligning posts a whole lot easier.

On top of that, ladders and safety gear should be ready before you start, and this counts double when fitting the roof frame and thatch (a roof frame isn’t the moment to realise your ladder is two rungs short). That way, the build flows a lot more smoothly from the very first step.

Do You Need a Permit to Put Up a Bali Hut in Australia?

From experience, this is the question so many people forget to ask until the structure is already going up. Local council regulations for outdoor structures vary across Australia, so it’s worth checking before you order.

In most states, a Bali hut or gazebo under a certain size is exempt from council approval. Check your local requirements first rather than assuming your structure qualifies.

More importantly, talk to your local council early and get written confirmation if you can. That advice takes about ten minutes to get and can save homeowners a serious amount of trouble down the track.

A Checklist of What to Have Ready on Build Day

A Checklist of What to Have Ready on Build Day

Most people don’t think about this until the kit is sitting in the driveway. Having everything on hand before delivery day means you can start the build straight away without a single hardware run.

The following table gives a clean breakdown of what you’ll need across two categories:

ToolsMaterials
Cordless drillConcrete mix
Rubber malletPost anchors
Tape measureFixing bolts
Spirit levelSandpaper
LadderTimber screws
Safety gearGravel or sand

Most of these are available at any hardware store across Australia. Sort this list out a few days before delivery and build day becomes a whole lot less stressful. That way, the only thing left to do is put the Bali hut together.

What to Check in Your Bali Hut Kit Before You Build

A rushed inspection on delivery day is one of the most common mistakes DIY builders make. Your kit’s quality counts from the moment it arrives, and a few minutes of checking saves days of delays.

These checks should happen before you pick up a single tool:

Reading the Manual and Checking Every Part on Arrival

Unbox everything carefully and lay the parts out so you can match them against the included packing list. From there, working through the manual section by section keeps the whole process logical and easy to follow.

In fact, read the instruction manual fully before assembly begins rather than partway through when you’ve already started putting things together. Most Bali hut kits are well made, but even quality deliveries can include a warped or incorrectly cut part.

Take note of the thatch panels, timber rafters, and roof sections in particular. These are the parts most likely to show damage on the underside, so inspect each one carefully before you sign off.

Who to Call If Something’s Missing or Damaged

Who to Call If Something's Missing or Damaged

Contact the supplier straight away with photos of the issue and your order number. That one step speeds up the resolution process more than anything else you can do.

Georgia Wiseman provides direct support for kit customers, so help is always just a phone call away. Our team has handled these situations many times and can arrange replacement parts for prompt dispatch.

A good Bali hut supplier gives you more than the kit itself. They stand behind the quality and durability of every part you receive. That level of support gives you confidence in the range you choose.

Ready to Build Your Dream Bali Hut?

So many people underestimate how much the prep work shapes the final result. A level site, the right tools, a council check, and a thorough kit inspection on arrival all help the build run smoothly. Getting these details sorted early makes the installation easier to manage once construction begins.

And here’s the thing: the Bali hut itself is the reward for doing all of that well. Get the groundwork right, and you’ll be relaxing under your thatch roof soon.

Georgia Wiseman has a fantastic selection of Bali hut kits and Bali gazebo styles for every backyard. Our range includes shady pool retreats, relaxing backyard spaces, and entertaining areas suited to Australian summers. Contact us whenever you’re ready to get started.

Read More

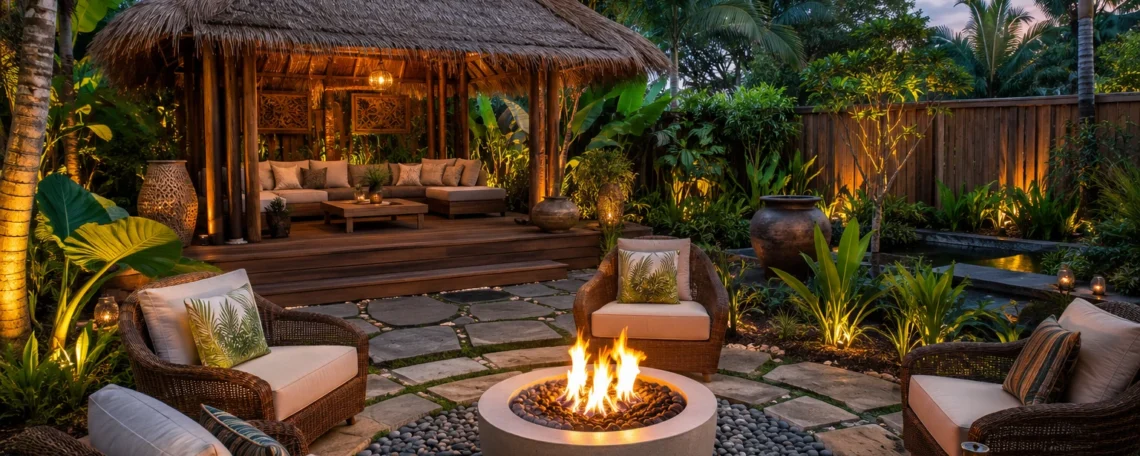
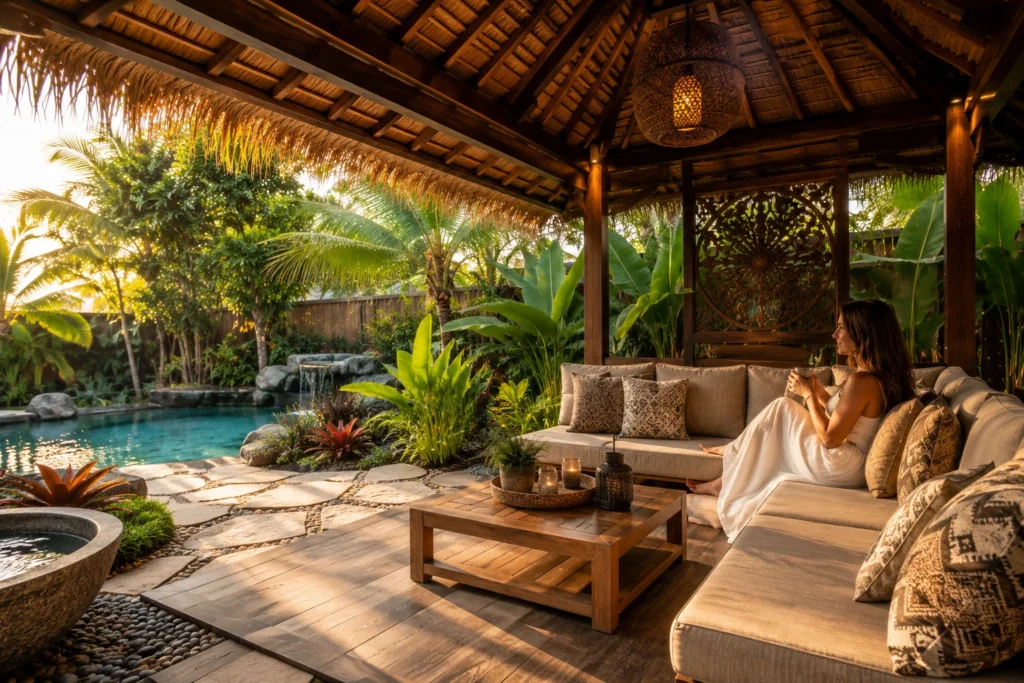
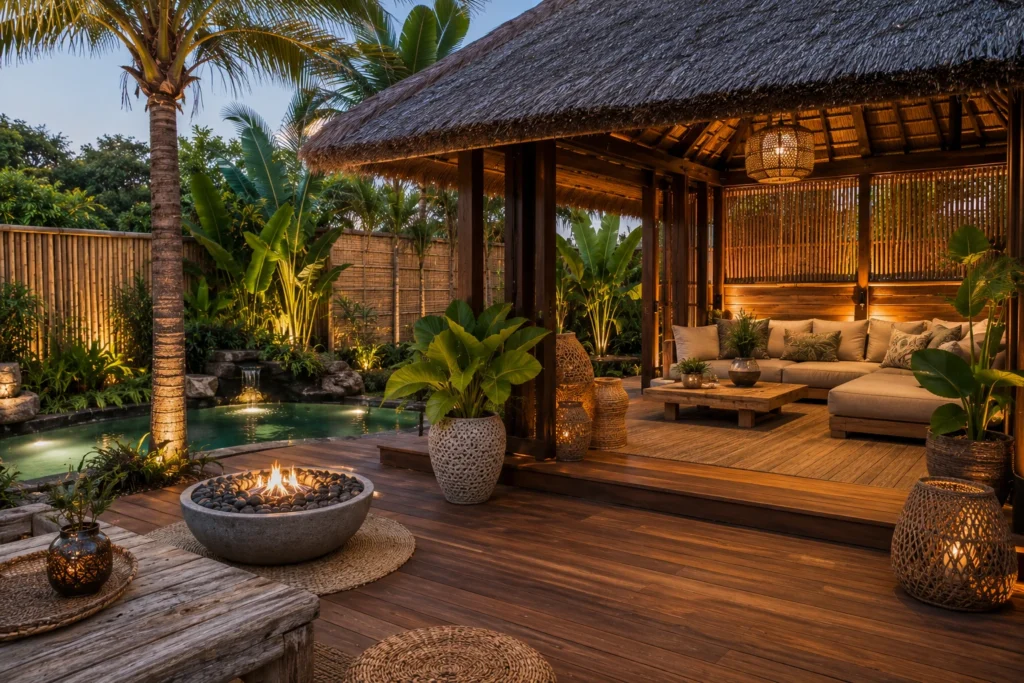
Backyard Retreat Ideas Using Bali Huts and Outdoor Seating

Backyard Retreat Ideas: Bali Huts & Outdoor Seating

A well-designed backyard retreat gives you a proper place to decompress. Yet many Australians aren’t getting the most from their gardens and leave valuable outdoor space with untapped potential for relaxation.

The good news is that your outdoor spaces don’t need a major overhaul to feel like a retreat. A Bali hut with comfortable seating creates a naturally shaded zone to relax in, and it works well even in a modest-sized space.

This article covers some practical backyard retreat ideas to help you get started. The aim is to design a garden that actually invites you outdoors.

Backyard Retreat Ideas: Where Do You Actually Start?

Most people kick off their backyard search with a rough idea and no clear sense of location. However, a bit of planning up front saves you from costly changes later. Here’s where to start.

Why a Bali Hut Works as the Main Structure

Ever wondered why so many Australian backyards now have a Bali hut at the centre of everything? It creates a comfortable, shaded retreat that makes outdoor living, entertaining, and relaxing more enjoyable throughout the year.

A Bali hut uses a thatched roof and timber frame to create natural shade without cutting off airflow. The space underneath stays cool and comfortable, even on a climbing summer day. In our experience, a well-placed Bali hut can drop outdoor temperatures by up to 10 degrees.

Why a Bali Hut Works as the Main Structure

It also gives your garden a defined room to build around, which makes planning the rest of your layout, including seating, plants, and trees, a whole lot easier. Most houses benefit from this kind of anchor point before anything else gets added.

How to Pick the Right Spot in Your Backyard

Afternoon shade and a bit of distance from the house are the two things to focus on when choosing the location for your Bali hut.

A good location gets natural shade in the afternoon and avoids direct westerly sun. That afternoon glare can make your outdoor spaces really uncomfortable, so it pays to figure this out before you commit.

Also, think about how far the hut sits from the house. The goal is to strike a balance: Close enough for the family, but with enough space between to create a sense of separation. That distance helps define the garden’s most welcoming feel, and gives you a proper spot to relax.

Outdoor Spaces That Feel Like Southeast Asia

Bali, one of Indonesia’s most beautiful small islands, is a top destination for tourists from the UK, Europe, and other Western countries. In fact, it is one of the most popular destinations for Australian travellers in recent times.

Visitors head to areas like Ubud, Kuta, Seminyak, and Sanur, where they enjoy a mix of culture, beaches, temples, and a relaxed outdoor lifestyle. That Balinese connection with nature and open-air living has guided outdoor design right across the world.

Here’s how to bring some of that into your own garden.

Natural Materials and Textures Worth Trying

The right materials can make a backyard feel like a proper tropical escape. For example, timber decking and bamboo screens sit naturally alongside a Bali hut and add that layered, organic look that defines Balinese design.

Natural Materials and Textures Worth Trying

To enhance the resort-inspired feel, focus on materials that age gracefully outdoors. Woven textures, earthy finishes, and handcrafted details help soften the space. Together, these elements create a relaxed atmosphere that feels both inviting and connected to nature.

Stone pavers around the base add texture. And natural plants and fibres like jute bring warmth and greenery to the scene.

Seating Layouts That Make You Want to Stay

Low, comfortable furniture and a view worth sitting in front of. That’s the seating layout that works best under a Bali hut.

To achieve this, arrange your seating to face a garden bed or open space, rather than a wall. A low daybed or lounge creates a familiar resort feel that’s easy to relax in. Plus, leave enough room so the outdoor spaces stay open, uncluttered, and actually fun to spend time in.

Small Details That Pull the Whole Look Together

Now that the structure and seating are sorted, the smaller finishing touches bring the whole space to life. To complete the look, outdoor lanterns or string lights set the scene for a peaceful evening.

For cushions, earthy tones or Balinese painting-inspired prints help tie the space back to the island’s art and culture. They also add a welcoming touch and create the subtle sense of paradise that the area may have been missing.

Should You Add a Fire Pit to Your Retreat?

A fire pit might just be the one addition that gets your outdoor retreat used twelve months of the year instead of six. There’s something about gathering around a fire on a quiet Friday evening that pulls the whole family in, and it works well in pretty much any outdoor environment.

Should You Add a Fire Pit to Your Retreat?

There are a few factors to consider before bringing one into your space.

  • Extends Your Outdoor Seasons: A well-placed fire pit gives the family more reasons to head outside through autumn and winter. It adds warmth to your outdoor spaces, a sense of nature and fun, and makes the garden feel more welcoming year-round.
  • Location’s Priority: Set it at least two metres from your Bali hut and any overhanging plants. The right location keeps everyone safe while still letting you sit close enough to enjoy it comfortably.
  • Fuel Type Changes The Experience: Gas fire pits are popular across the world and easy to control, which suits UK and Australian families who want something reliable. Wood-burning options add atmosphere, crackling sounds, and a campfire scene that’s hard to replicate.

Either way, a fire pit is one of those accessories that adds real value to an outdoor space. It keeps the space inviting well into the evening. The added warmth also helps the garden feel more complete and welcoming, especially.

Your Backyard Retreat Is Closer Than You Think

A backyard retreat comes down to three things: solid shade, comfortable seating, and a few details that make the space feel right. Sort those out, and the garden becomes a proper destination.

Georgia Wiseman offers high-quality Bali huts with a 20-year frame warranty and guidance on location and setup. Our team will help you create a complete outdoor space, with tips on greenery, accessories, and seating that suits your garden perfectly.

So the first step is simple. A new Bali hut could be the best purchase you make for your backyard this year, and on arrival, you’ll wonder why you waited.

Read More