Daily Archives: October 4, 2026

Bali Hut Drainage: Where Should Rainwater Go Around the Base?

Bali hut drainage

Rainwater around your Bali hut base should drain into a gravel trench, a garden bed, or your stormwater system. If water cannot drain away from the base, it can collect around the posts, soak into the timber and leave the surrounding soil wet.

This drainage problem often becomes obvious during heavy rain, when water starts pooling around the hut base. At Georgia Wiseman, we hear from owners every wet season after they notice water collecting around their huts.

This guide covers why water gathers, which options suit a backyard, and when to address them during installation, so your hut stays well-drained and protected. Let’s get into details.

Why Does Water Pool Around Bali Huts After Heavy Rain?
Bali hut in an Australian suburban backyard after heavy rain

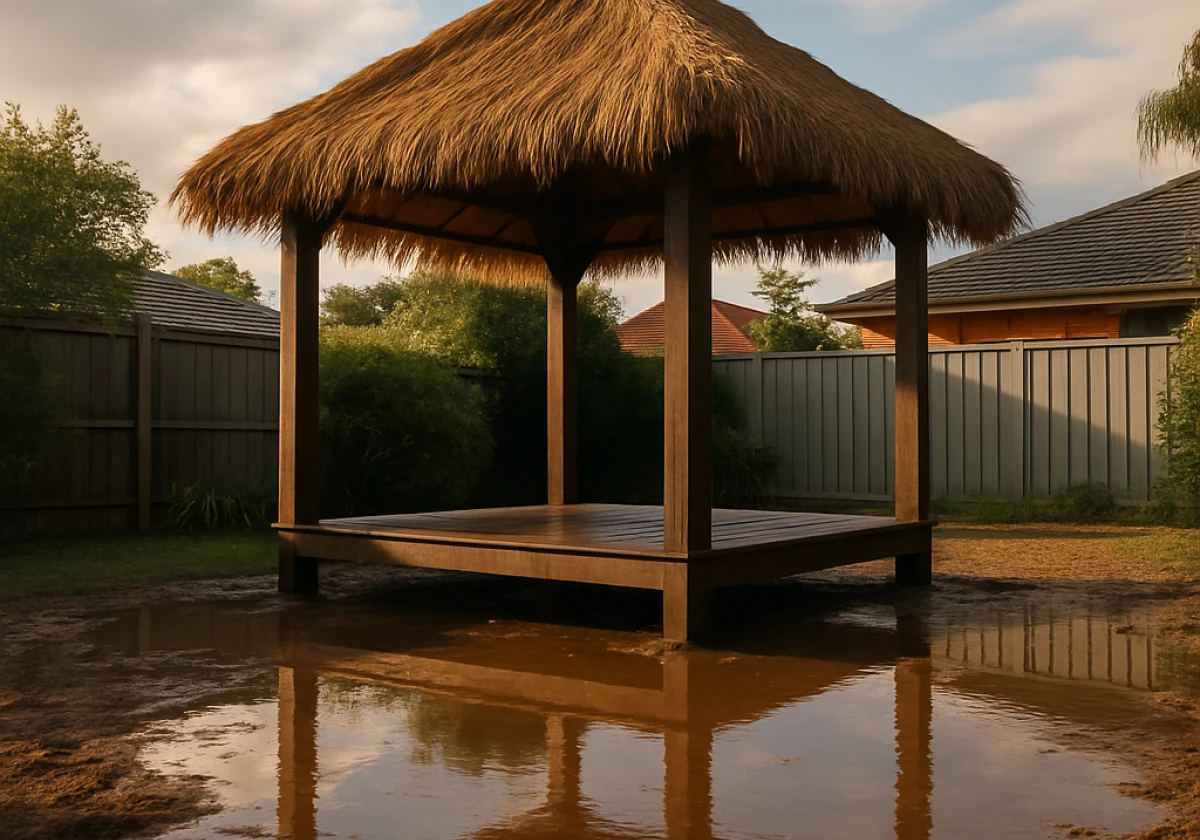
Water pools around Bali huts when the ground slopes toward the base or the soil drains too slowly. Generally, clay soil holds water instead of letting it soak through, and much of the eastern seaboard sits on some version of it. So the rain running off your thatched roof reaches the ground and simply stays where it lands.

Roof size makes water pooling significantly worse. A 4m by 3m Bali hut, for instance, covers around 12 square metres of roof area and can shed roughly 240 litres of water along its edges during a 20 mm downpour. Sydney alone averages around 1,200 mm of rain a year according to the Sydney Weather, and every millimetre of that rainfall has to go somewhere.

Another factor is how nearby garden features affect drainage. Many backyards place Bali huts near water features, bird baths and garden beds, with bamboo fencing separating different areas. And bamboo fencing across the natural drainage path can slow water moving away from the hut. If you leave it without fixing, that trapped water softens the footings and works into the timber from below (mud stains on the posts give it away).

Giving that water a clear route away from the hut helps prevent it from collecting around the posts. Owners who skip this step often end up dealing with the same puddle every winter.

Gravel Trenches, Garden Beds and Stormwater Pits: Outdoor Structure Drainage Options
Bali hut installation site with exposed earth and graded slope

Most owners only pick a drainage option after the puddles appear rather than before the first storm hits. Moving to the fix itself, each option suits a different soil type and a different budget.

Weigh up these three options that cover nearly every backyard.

OptionBest forWhat it involves
Gravel trenchRoof runoff at the drip line300 mm strip of 20 mm gravel, simple DIY
Garden bedLight runoff, sandy soilMulched planting, suits a Bali garden with vase pots
Stormwater pitHeavy runoff, clay soilPipework into existing drains, a plumber’s job

Simply put, the gravel trench handles most backyard huts on free-draining soil, while clay blocks need the pit to shift the volume. So run both together when your yard sits at the bottom of the slope.

Bottom Line: Outdoor structure drainage is about capacity first and looks second.

Planning Drainage During Your Bali Hut Installation
Close-up ground-level view of a Bali hut's wooden post

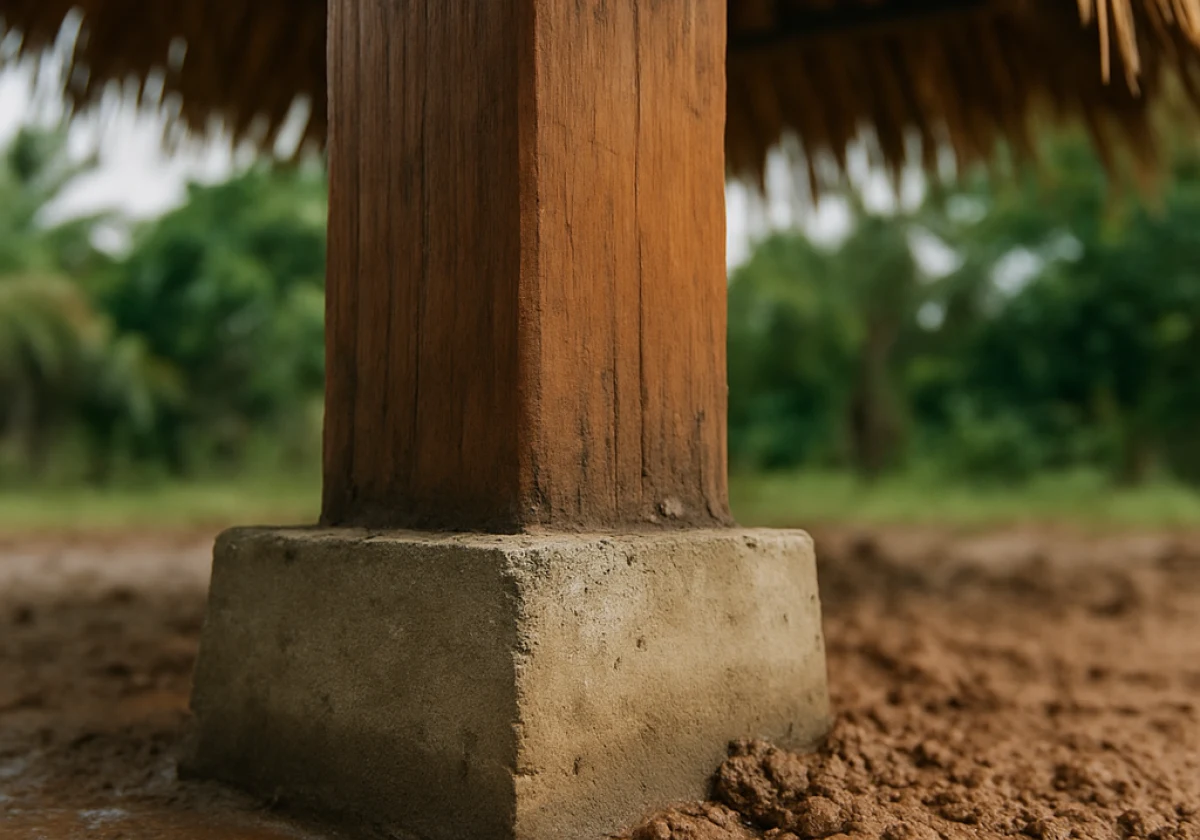
Sorting drainage during Bali hut installation saves you digging up pavers and garden beds later on. With the site already open, the trencher is there, and the posts aren’t sitting in concrete yet.

Most DIY kits ship with installation instructions for the frame and the roof, though few of them say a word about where the water ends up.

In this case, three jobs deserve your attention while the ground stays exposed.

Grading the Site So Water Runs Away from the Posts

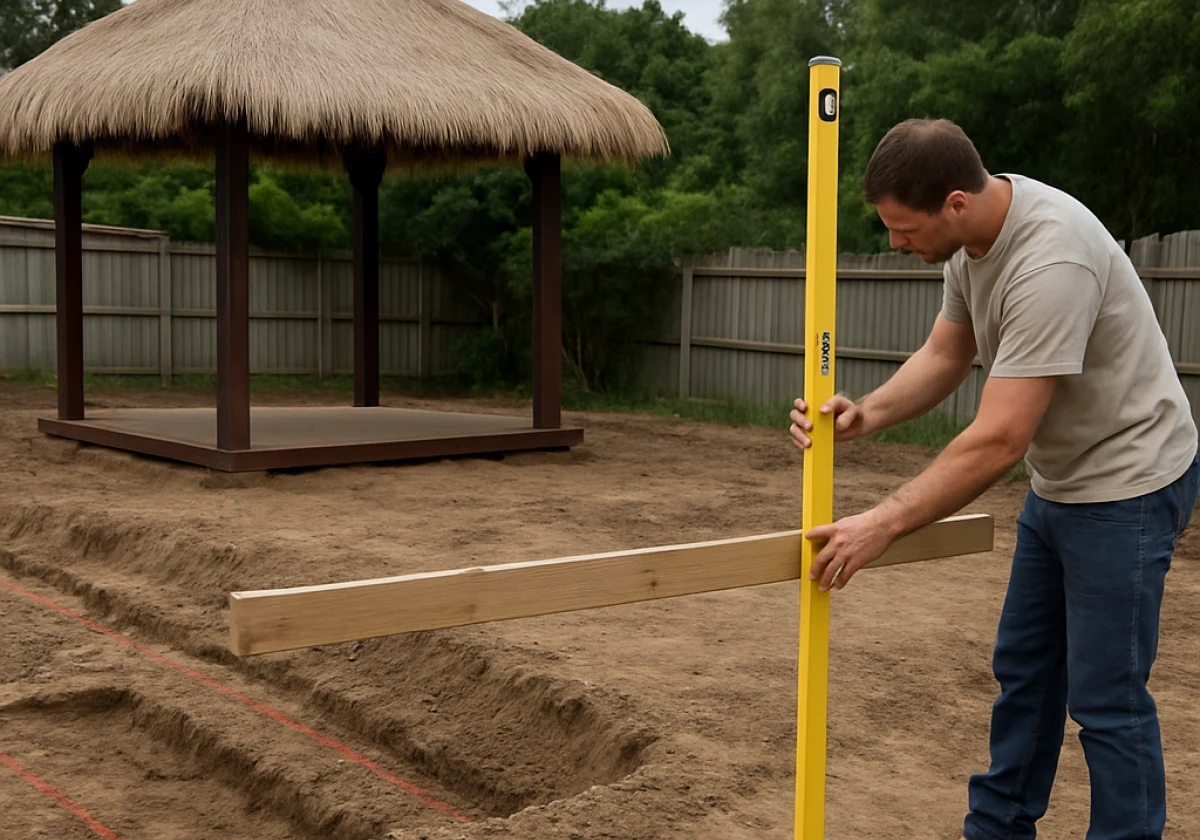
Grade the ground away from the hut at roughly 25 mm of fall per metre for the first two metres. That slope stays comfortable underfoot and still carries water off the base.

You can even check it with a spirit level on a straight length of timber rather than trusting your eye, because a shallow back fall stays invisible from standing height.

Once you get that fall wrong, every storm sends the runoff straight back at the posts (we re-graded one Gold Coast site twice).

Adding a Gravel Drip Trench Under the Cape Reed Roof Edge

A 300 mm-wide trench directly under the roof’s drip line gives runoff somewhere to drain. You need to fill it with 20 mm gravel to just below the surface. Gravel catches the sheet of water coming off the thatch and lets it soak down, instead of splashing mud back onto the posts and screens.

Honestly, this is the first change we’d make on any existing hut, since a weekend with a mattock beats replacing hardwood later.

When to Check with Your Local Council About Stormwater Rules

Check with your local council before directing Bali hut runoff into the stormwater system, altering drainage near an easement, or carrying out work that could affect neighbouring properties. Council requirements vary between areas, so confirm the local rules before you start.

Councils generally treat a roofed structure over a set floor area as work that needs approval. And the drainage plan forms part of that application, especially where the hut sits close to a boundary.

More importantly, a call to your council’s planning team can clarify which approvals apply before you start. Ask about boundary setbacks at the same time, especially when the hut sits close to a property line.

Good Backyard Drainage Protects Your Thatch, Timber and Decking

Now that we’ve covered the groundwork, here’s how backyard drainage keeps the hut itself in good form. You’d be surprised how much of our repair work traces back to one wet corner of a yard.

Four parts of the build feel the difference first.

  1. Posts and Footings: Standing water rots the base of hardwood posts even where installers set them in concrete, because moisture collects in the joint. Meanwhile, dry footings hold the stability and durability the frame was designed around.
  2. Thatch and Roof Edges: Splashback drives grit into the lowest layers of bali thatch, and damp cape reed breaks down years ahead of schedule. In this case, keeping the ground under the eaves dry reduces that moisture exposure and helps protect the thatching grass and tie wire.
  3. Bamboo Panels and Screens: These stay fixed near the ground and can wick moisture from wet soil. Over time, that moisture can soften the base and affect their appearance.
  4. Decking and Pavers: Wet ground under a deck lets bearers settle unevenly, so boards cup and pavers rock underfoot within one season.

Quick Tip: Walk the perimeter the morning after the next storm and mark every patch still holding water. Those marks show you exactly where to dig, and ensure you check them again after the following downpour.

Get Your Bali Hut Drainage Sorted Before the Next Downpour

Rainwater around a Bali hut only causes trouble when it has nowhere to go. But when you give it a route, the posts, thatch and decking all last the way they should.

Walk your yard before the next downpour and decide where that water should end up. A trench dug on a free Saturday costs far less than replacing roof structures later, and drainage handled at the start never needs doing twice.

If you’re planning a Bali hut, think about drainage before installation rather than after the first heavy rain. Georgia Wiseman can help you consider the hut position and surrounding area as part of the setup. Get in touch with our team if you need guidance before installation.

Read More

When Timber Meets the Ground: What Bali Hut Owners Should Know About Termite Risk

Bali hut drainage

Bali hut termite risk starts where timber meets the ground, because that single contact point gives subterranean termites a direct path straight into your posts. They travel up through the soil, reach the timber, and start feeding well before the outside of the post shows a mark.

Most owners only think about this after the thatch sags or a post shifts under a gentle push from one hand. That timing hurts, since an early fix costs a fraction of replacing the frame and re-thatching the whole roof.

This guide covers the warning signs, the protection options, and the maintenance habits that keep your Bali hut standing for decades. Let’s get into it.

Why Are Bali Huts So Attractive to Termites?

## Why Are Bali Huts So Attractive to Termites- generate the image

Bali hut termites get their start where timber meets the ground. That one contact point gives subterranean termites a straight path into your posts, and they feed for months before the outside of a post shows a mark.

Most owners only look closely after the thatch sags or a post shifts under one hand. Honestly, that timing hurts. An early fix costs a fraction of replacing the frame and re-thatching the roof.

Timber and thatch sitting in soil hand a colony shelter, moisture and food in one spot. Termites are social insects, so a single nest can send thousands of workers at that free meal. Three weak points explain most of the damage.

Subterranean Termites Love Ground Contact

Subterranean termites nest below ground and travel through soil to find food. A post buried in dirt gives termites a free entry point.

Termites target wood for the cellulose it contains, and damp softwood is the easiest meal around. For this reason, footings deserve more attention than the roof above them, since a post set directly into the ground stays wet for days after rain.

Across the huts we have repaired around Brisbane, the posts sunk into soil always fail first (the roof usually outlasts them by years).

Does Bali Hut Thatch Attract Termites Too?

Natural Bali hut thatch rarely draws termites on its own, since alang alang and cape reed are grasses rather than wood. However, the timber frame underneath is what attracts them.

Worn thatch causes the problem indirectly, because a leaking roof soaks the timber frame and keeps it damp for weeks at a time.

Most thatch that Bali hut owners buy today is either natural grass or a synthetic Bali panel. Both types shed water reliably when the installer laps each panel correctly, so the joints are the first place to check when a leak appears.

The Weak Links: Posts, Footings and Hidden Timber

Posts, footings and hidden timber cause most failures, and each one hides the trouble until the structure starts to move.

Stirrups lift every post off the slab so the timber never touches soil, and stainless steel fittings stop rust from opening gaps. Many Bali hut kits ship with untreated frames, and soft coconut pine gives a colony an easy meal.

Check the hidden pieces too. Bearers, handrails, and roof structures all sit where you would never think to look.

Early Warning Signs: How Bali Hut Termites Show Up in Outdoor Timber Structures

Homeowner's hand in the foreground tapping a wooden post

Design aside, most owners notice trouble months after the colony has already moved in. Passing your hut every day for five years means you stop noticing it. The surface still looks like solid timber, but the core has quietly turned to paper.

Here is the thing. State Forestry independent data shows that one in every five Australian homes will be attacked by termites at some point in its life. Outdoor timber structures are even more exposed than most homes, sitting much closer to the soil.

Five signs give the game away early, and none of them needs a ladder.

  1. Mud Tubes on Posts: Pencil-thin lines of mud up a post show workers commuting between the underground nest and your timber.
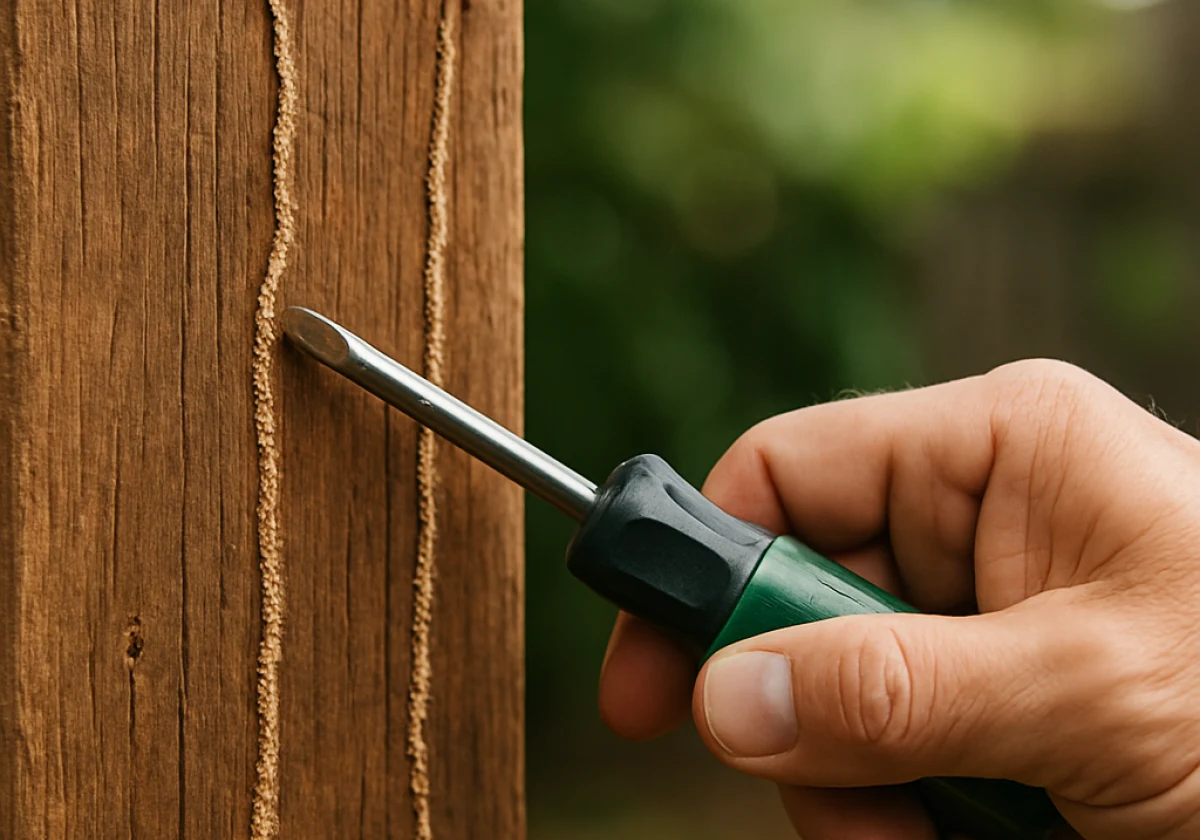
  2. Hollow-Sounding Timber: Tap each post with a screwdriver handle and listen for a drum note instead of a solid thud.
  3. Sagging Roofline or Thatch: When the ridge dips or one side slumps, a frame member has lost its strength.
  4. Discarded Wings and Frass: Tiny wings on the slab after warm, humid weather point to a nest close to the house.
  5. Soft Spots Near Water: Where water pools or drips, the timber stays soft, and a thumb press sinks into the surface.

Two signs together usually mean an active colony rather than old damage left by a previous owner. In that case, book a pest inspection that week rather than waiting for the next storm.

Choosing the Right Timber Termite Protection for Your Bali Hut

Pest controller crouching beside a wooden Bali hut post

Good timber termite protection adds years to a hut for less than one repair bill. Your best option depends on whether you are building now or defending a hut already in the ground.

OptionBest ForTypical CostLongevity
Physical barriers (stirrups, ant caps, mesh)New builds and post replacements$300 to $80020 years plus
Chemical soil treatmentExisting huts with ground contact$600 to $1,5005 to 8 years
DIY kitsSmall gazebos and low-risk sites$80 to $2501 to 2 years
Professional termite management systemHigh-risk blocks and large structures$2,000 to $4,0008 years with annual checks

Call a licensed pest controller the moment you spot live activity, as a DIY kit cannot reach a nest sitting metres away beneath the lawn. By contrast, the chemical treatments that termite technicians apply around your footings will typically last five to eight years.

Before work begins, ask what the termite treatment covers and whether your build includes a structural warranty. Australian Standards already specify termite management requirements for new homes, and meeting that same standard for your hut adds very little to the build cost.

A DIY Bali hut kit can still be properly protected. The key requirement is that the posts rest on stirrups and never contact the soil directly.

Regular Bali Hut Maintenance Keeps White Ants Away for Good

Simple Bali hut maintenance habits keep termites from coming back season after season. Regular inspections termite specialists run each year cost around $300 and catch activity while it’s still confined to one post or bearer.

It’s the same inspection pest controllers run on a house, only quicker. Book yours in the same month each year so the job never slips off the list.

Between visits, keep soil, mulch and garden beds at least 75 mm clear of every post so the base stays visible. Leaks deserve the same urgency, since a dripping spa fitting or a blocked downpipe keeps timber wet long enough for a colony to settle in. Fix them the week you notice (a $12 washer beats a new post).

After a big blow, check the thatch for lifted sections and thin patches. Plenty of owners leave this until the first drip appears inside, and by then the frame has taken weeks of water.

Huts we installed years ago still have sound posts, and the owners who kept mulch clear of the base are the reason why. Buyers read a sagging roof as a bill waiting for them, so a well-kept hut protects property value too.

Bottom line: An outdoor living space is only worth what the frame under it is worth.

Give Your Bali Hut the Care It Deserves

Bali hut termites never announce themselves, and the ground contact under your posts does the damage quietly over several seasons. Two or three checks each year keep a small problem from becoming a full rebuild.

Walk out this weekend, look hard at the base of every post, and note anything soft, muddy or damp. Then get a qualified set of eyes on whatever worries you (five minutes now beats a rebuild quote later).

Georgia Wiseman builds, re-thatches and maintains Bali huts, gazebos and outdoor timber structures for homes right across Australia. Contact us to book an inspection and enjoy real peace of mind.

Read More